
Open 24/7! Servicing all of Sydney’s Eastern Suburbs
Our Average Response time is: 1hr 53min 47sec
Few household problems are as frustrating as running out of hot water halfway through a shower! Whether your current system has reached the end of its life or you're planning an upgrade, choosing the right replacement can make a big difference to your comfort, energy bills, and long-term running costs.
For most, the first decision comes down to how you want your hot water delivered: a continuous (instant) hot water system that heats water only when you need it, or a storage hot water system that keeps a tank of heated water ready to use. While the difference may seem straightforward, each option has its own advantages depending on your household size, water usage, available space, and budget.
In this guide, we'll explain how continuous and storage hot water systems work, compare their pros and cons, explore installation and running costs, and help you determine which option is the best fit for your home. By the end, you'll have the information you need to make a confident, informed decision.
A continuous flow hot water system (also called an instant or tankless hot water system) heats water only as you use it. When you turn on a hot tap, cold water passes through a heat exchanger inside the unit, is heated almost instantly by a gas burner or electric element, and comes out at the temperature you have set. When the tap is turned off, the unit shuts down. There is no stored hot water and no standby heat loss.
Most Sydney homes use gas continuous flow systems. Electric whole-house models are available but typically require three-phase power, which many residential properties do not have. Small electric instant units for a single bathroom are an option for apartments.
A storage hot water system heats water and holds it in an insulated tank ready for use. The tank is heated by gas, electricity, a heat pump, or solar panels. When you turn on a hot tap, pre-heated water flows from the top of the tank while cold water enters at the bottom to be heated next.
The system maintains the stored water at around 60 to 70 degrees Celsius to prevent bacterial growth (specifically Legionella), which means it is always using some energy to keep water hot even when nobody is using it.
Tank sizes range from around 25 litres for a single person up to 400 litres or more for large households. Once the tank is depleted, you have to wait for the water to reheat, which can take anywhere from 30 minutes to over an hour, depending on the system and energy source.
The table below summarises the main differences between continuous (instant) and storage hot water systems before we explore each option in more detail.
| Feature | Continuous (Instant) Hot Water | Storage Hot Water |
| Heating method | Heats water on demand as you use it | Pre-heats and stores hot water in a tank |
| Hot water supply | Continuous hot water while the tap is running | Limited by the size of the storage tank |
| Energy use | Uses energy only when hot water is needed | Uses energy continuously to maintain water temperature (standby heat loss) |
| Typical upfront cost (unit + installation) | Around $1,200–$2,500 (gas systems) | Around $800–$1,800 (electric or gas systems) |
| Estimated annual running cost (4-person household) | Approximately $250–$600 (gas) | Approximately $450–$1,100 (electric storage) |
| Physical size | Compact, wall-mounted unit | Larger storage tank (indoor or outdoor installation) |
| Typical lifespan | Around 15–20 years | Around 8–12 years |
| Best suited for | Small to medium households, homes with limited space, and those wanting greater energy efficiency | Larger households with high simultaneous hot water demand or homes paired with solar energy |
Has your hot water system stopped working? Whether you need urgent repairs or expert advice on whether it's time to repair or replace your unit, our experienced plumbers are here to help. Learn more about our Hot Water Repairs service and get your hot water back up and running quickly.
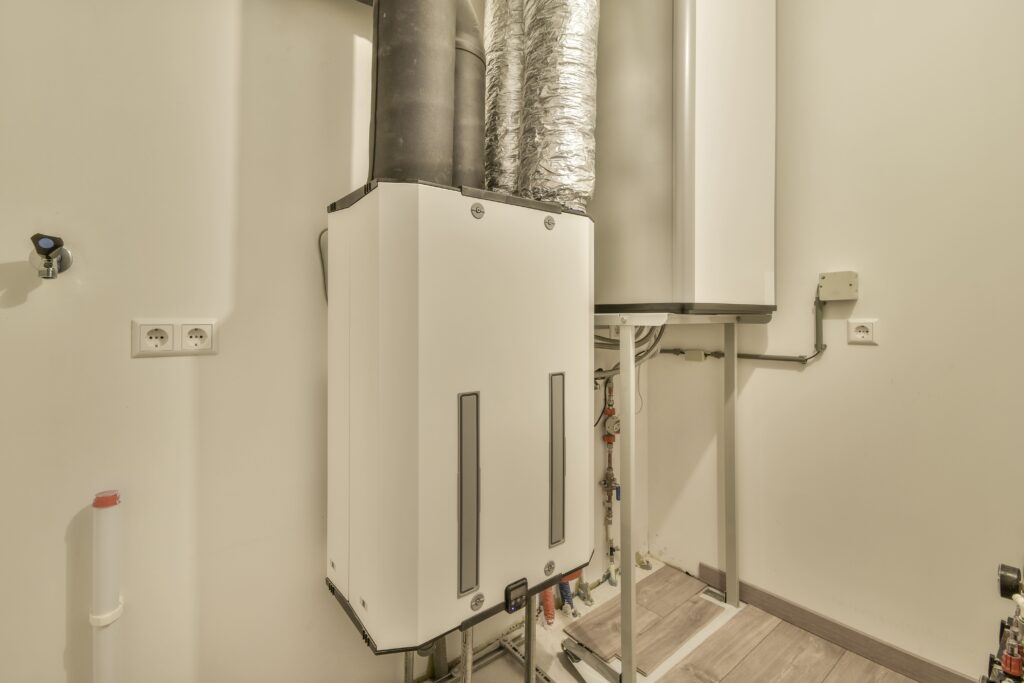
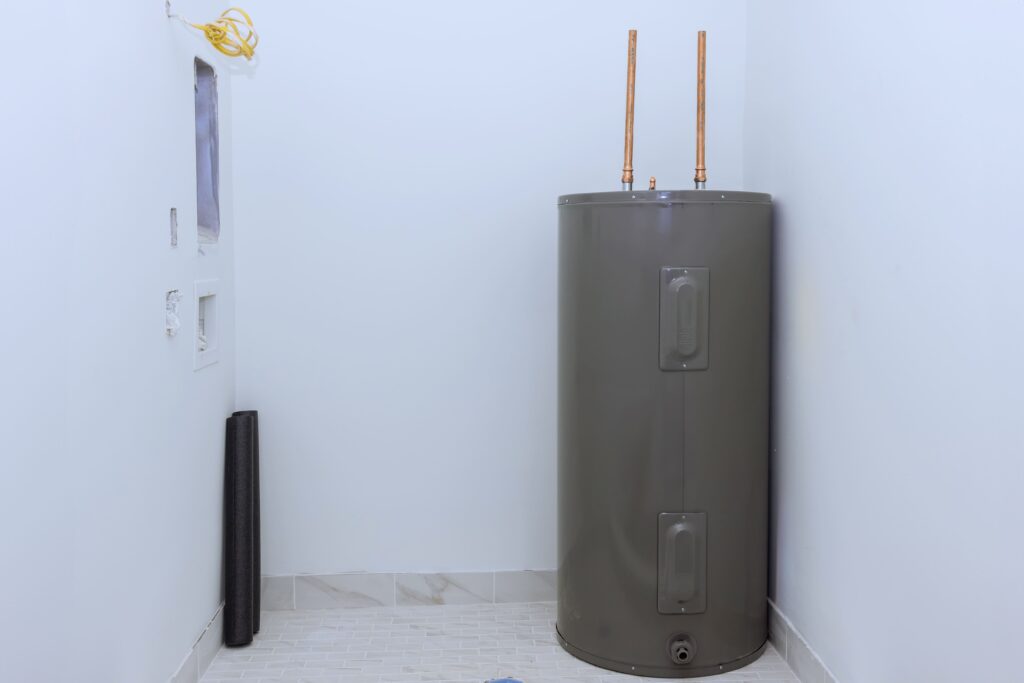
Continuous (instant) hot water systems have become an increasingly popular choice for Australian homes.
However, like any hot water solution, they're not the perfect fit for every household. Understanding both the benefits and potential drawbacks will help you decide whether a continuous flow system suits your home's needs.
One of the biggest advantages of a continuous flow system is that you don't have to worry about running out of hot water. Instead of storing heated water in a tank, the unit heats water as it passes through the system. As long as the tap is running and the system is operating within its capacity, you'll have a continuous supply of hot water.
Other key benefits include:
While continuous flow systems offer many advantages, they also have some limitations that homeowners should consider.
Some of the most common drawbacks include:
Storage hot water systems have been a popular choice in Australian homes for decades. By heating and storing a set volume of water in an insulated tank, they're designed to have hot water ready whenever you need it. While they're a reliable and cost-effective option for many households, they also come with a few limitations worth considering.
One of the biggest strengths of a storage hot water system is its ability to supply multiple outlets at the same time. As long as there is enough hot water in the tank, several people can shower or use hot water appliances simultaneously without experiencing a drop in water pressure.
Despite their reliability, storage systems can be less energy efficient than continuous flow units because they continuously work to maintain the temperature of the stored water, even when no hot water is being used.
Upfront cost is what most homeowners focus on, but the more useful number is the total cost of ownership over the system's lifespan. A system that's cheaper to buy may cost significantly more to run over time, while a more expensive unit could save you money through lower energy bills and a longer lifespan.
Looking at the total cost of ownership (including purchase price, running costs, and expected lifespan) gives you a much clearer picture of which option offers the best value.
| System Type | Typical Upfront Cost (Unit + Installation) | Estimated Annual Running Cost* | Typical Lifespan | Estimated 10-Year Cost |
| Gas Continuous (Instant) | $1,200–$2,500 | $250–$450 | 15–20 years | $3,700–$7,000 |
| Gas Storage | $900–$1,800 | $400–$600 | 10–15 years | $4,900–$7,800 |
| Electric Storage (Standard Tariff) | $800–$1,500 | $800–$1,200 | 8–12 years | $8,800–$13,500 |
| Electric Storage (Off-Peak Tariff) | $800–$1,500 | $400–$700 | 8–12 years | $4,800–$8,500 |
| Heat Pump Hot Water | $2,500–$4,500 | $200–$400 | 10–15 years | $4,500–$8,500 |
💡Estimated running costs are based on a typical four-person Sydney household. Actual costs will vary depending on your energy provider, tariff, household size, and hot water usage.
If your home has access to natural gas, a continuous (instant) gas hot water system is often the most economical option over the long term. Although the upfront investment is higher than many storage systems, lower running costs and a longer lifespan can make it the better value over 10 to 20 years.
Storage systems generally cost less to install, making them an attractive option if you're replacing a failed unit on a tighter budget. However, electric storage systems, particularly those on standard electricity tariffs, can become much more expensive to run over time due to the energy required to keep the water hot.
Heat pump systems have the highest initial purchase price but offer some of the lowest ongoing running costs, making them a worthwhile investment for homeowners focused on long-term energy savings.
💡Good to know: If you're changing from a storage hot water system to a continuous flow unit (or vice versa), additional plumbing, gas, or electrical work may be required. Depending on your home's setup, this can add approximately $300–$800 to the installation cost.
The right choice comes down to four things: household size, gas availability, space, and whether you are replacing like-for-like or starting fresh. Here is a straightforward breakdown.
A continuous flow gas system is almost always the better choice here. Demand is low, so flow rate limitations are not a concern. The energy savings compound over a longer lifespan, and the compact footprint suits apartments and studios. If gas is not available, a small electric storage system or a single-tap electric instant unit is a reasonable alternative.
This is where the decision gets more nuanced. A quality gas continuous flow unit (look for models rated at 20 litres per minute or more) handles most family demands well, as long as everyone is not showering simultaneously. If your household has peak-time traffic across multiple bathrooms, a 250-litre gas storage system is more reliable.
Recommended Read: What Size Hot Water System Does Your Household Need?
For households running multiple bathrooms simultaneously or with high morning demand, a large storage system (315 to 400 litres) or two continuous flow units in parallel are both viable solutions. Heat pump hot water is worth considering here too: the higher upfront cost is offset by running costs that are similar to gas, without needing a gas connection.
Space is usually the deciding factor in Sydney apartments and Eastern Suburbs terraces. Continuous flow wins here almost by default: a wall-mounted unit the size of a suitcase versus a tank that requires a dedicated outdoor area or hot water cupboard. Many strata buildings also prohibit roof-mounted solar, which removes that option entirely.
From 1 July 2024, new homes in NSW cannot connect to the gas network for space heating, water heating, or cooking. This does not affect existing homes with gas connections, but it does change the picture for new builds and major renovations. If you are building new or doing a significant renovation, electric heat pump hot water is increasingly the go-to recommendation from NSW plumbers, with federal government rebates available to reduce the upfront cost.
Recommended Read: Best Hot Water System for Australian Homes
Choosing a new hot water system isn't something most people do very often, After installing hot water systems across Sydney for years, the Plumberoo team sees the same mistakes repeat. Worth knowing before you sign anything.
Choosing between a continuous (instant) and storage hot water system comes down to your household's needs, budget, and long-term priorities. If you're looking for greater energy efficiency, a compact design, and an endless supply of hot water, a continuous flow system is often the best choice. On the other hand, if your home has high simultaneous hot water demand or you're working with a tighter upfront budget, a storage system may be the better fit.
The key is choosing a system that's correctly sized for your household and installed by an experienced professional. A well-matched hot water system will provide reliable performance, lower running costs, and years of dependable service.
If you're still unsure which option is right for your home, the team at Plumberoo can help. We'll assess your household's hot water needs, explain your options, and recommend a solution that delivers the best value for your home and budget. Whether you're replacing a failed system or planning an upgrade, we're here to make the process simple and stress-free.
Blocked drains are one of those everyday problems most of us run into at some point. While a plunger can do the trick most times, some blockages sit deeper in the pipe or are a bit too stubborn to shift with simple suction alone.
In these cases, a drain snake (or toilet auger) can be a real lifesaver! These tools are designed to reach further into your plumbing and break up or pull out the tougher clogs that a plunger can’t always reach.
Used correctly, they can clear most household blockages quickly and effectively. But they do need a careful hand. Too much force or using the wrong tool in the wrong fixture, however, can end up causing damage instead of solving the problem.
In this quick guide, we’ll walk you through how to use a drain snake or toilet auger safely, when to use each one, and the common mistakes to avoid so you can tackle blockages with confidence
While they are often used interchangeably, a drain snake and a toilet auger are actually designed for different types of blockages and fixtures. Understanding the difference is important—not just for getting the job done properly, but for avoiding unnecessary damage to your plumbing.
A drain snake is a long, flexible metal cable with a coiled or corkscrew-style tip and a hand crank. You feed it into a sink, shower, tub, or floor drain, then rotate the handle to break up or hook the blockage so it can be pulled back out.
Because the cable is thin and flexible, it can follow the bends in household pipework with ease. This makes it ideal for clearing everyday blockages in drains where hair, soap build-up, or debris tends to collect.
A toilet auger is designed specifically for toilets. It’s shorter, stiffer, and includes a protective curved sleeve at the end.
That sleeve is the key difference as it rests against the porcelain bowl and guides the cable safely through the toilet’s S-bend without scratching or cracking the surface. This allows you to clear blockages inside the toilet trap without damaging the fixture.
🚽Unlike a standard drain snake, it’s built to work within the tight shape of a toilet’s internal plumbing.
For more stubborn or deeper blockages, plumbers may use powered or drum augers. These are much longer, often 8 metres or more, and motorised for extra force.
They’re typically used for sewer lines or heavy-duty blockages that sit beyond the reach of standard hand tools. While highly effective, they require experience to operate safely, as excessive force or incorrect handling can damage pipes or cause injury, particularly in older plumbing systems.
| Feature | Drain Snake | Toilet Auger |
| Primary Use | Sinks, showers, tubs, floor drains | Toilets only |
| Cable Design | Long, flexible metal cable | Shorter, stiffer cable |
| Head Type | Corkscrew or hook-style tip | Spiral head with protective sleeve |
| Flexibility | High – designed to navigate bends in pipes | Moderate – designed for toilet trap shape |
| Protective Features | None | Curved rubber/plastic sleeve to protect porcelain |
| Risk of Damage | Low in appropriate drains | High if used incorrectly or in the wrong fixture |
| Ease of Use | Moderate | Easy for most homeowners |
| Best For | Hair, soap scum, general household clogs | Toilet paper, waste, small obstructions |
| Typical Length | Varies (often 3–10m+) | Short (usually 0.6–1m) |
| Professional Version | Drum/powered augers for deep blockages | Rarely powered in household use |
| Key Advantage | Versatile for multiple drain types | Safe and specifically designed for porcelain toilets |
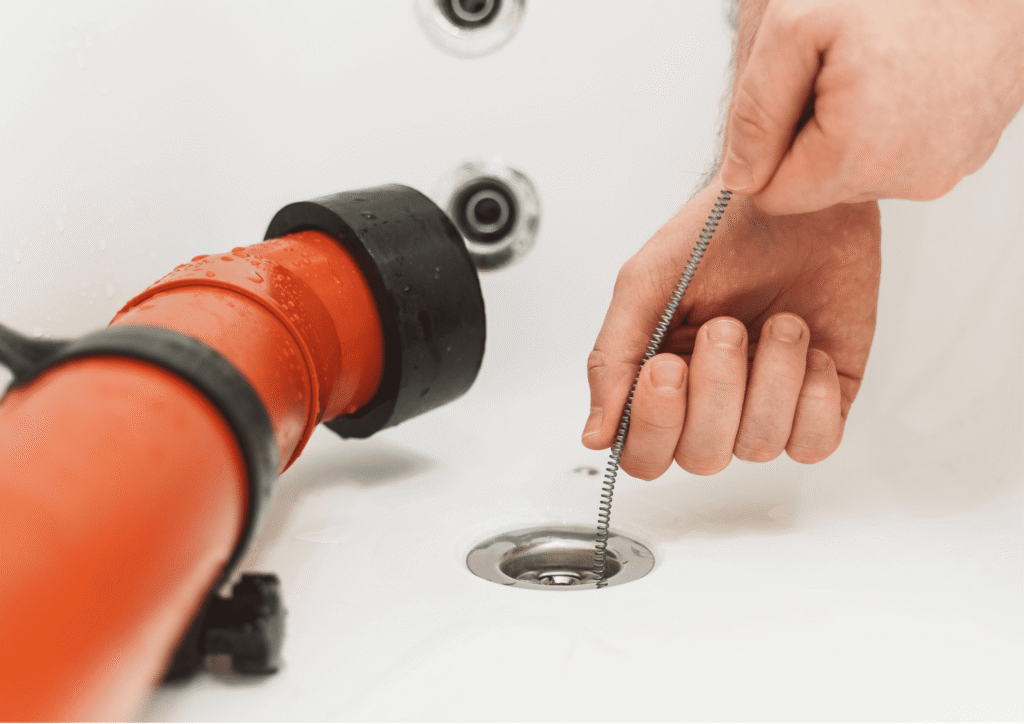
Snaking a sink or shower drain is a straightforward DIY task for most homeowners, as long as you take your time and let the tool do the work. The key is control; gentle pressure, slow movement, and patience will get you much further than force ever will.
Before you bring out the drain snake, a little preparation goes a long way!
Put on rubber gloves and, if possible, lay down an old towel to catch any mess. Position a bucket underneath the pipework if you can access it. Then remove any visible obstructions like a pop-up stopper, drain cover, or strainer so the cable has a clear entry point.
It’s also best to avoid pouring chemical drain cleaners down beforehand. If the clog doesn’t clear, you’ll be working in a pipe full of harsh, caustic liquid that can splash back during snaking. Over time, these chemicals can also weaken the cable, making it more likely to snap under pressure.
Recommended read: How to Unblock a Shower Drain
💡Pro Tip: Check the P-Trap First
In many bathroom and kitchen sinks, the blockage is actually sitting in the P-trap—the U-shaped pipe directly under the basin. Placing a bucket underneath and unscrewing the trap is often quicker, cleaner, and easier than snaking from above.If the clog is there, you can clear it directly without needing to feed a cable through the entire pipe system.
A toilet auger is the right tool when a plunger has done all it can, but the water is still sitting high in the bowl or draining painfully slowly.
💡The exposed metal cable of a snake drain can easily scratch the glazed surface or, under pressure, crack the bowl. A proper auger is designed specifically to prevent this damage with a curved protective sleeve that guides the cable safely through the toilet trap.
Put on heavy rubber gloves and lay old towels around the base of the toilet to protect the floor from splashes. Pull the auger handle all the way up so the cable is fully retracted into the sleeve. This ensures only the protective housing will make contact with the toilet.
Don’t want to use a auger? Here is an alternative: How to Unblock a Toilet Without a Plunger
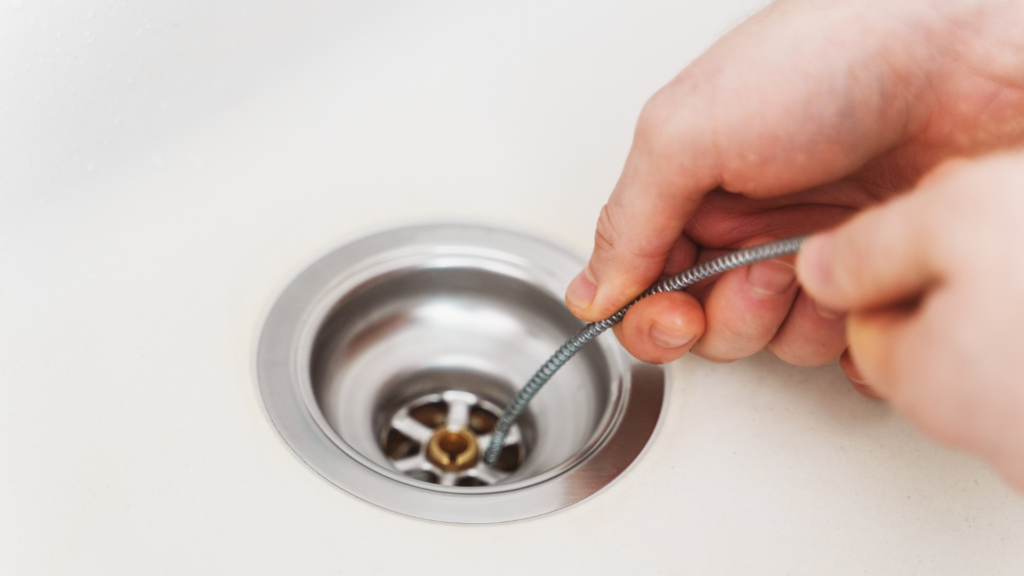
There comes a point where a drain snake and auger can only do so much, and recognising that limit is important for avoiding damage and making the problem worse.
When you hit resistance, it means the cable has found something—whether that’s a bend in the pipe, a blockage, or a joint. The instinct is often to push harder, but that’s exactly what causes problems.
Applying too much force can compact the blockage further, kink the cable, or even drive the tip into a weak point in older or worn pipes. In plumbing, slow and steady always wins. Let the tool work—don’t overpower it.
A drain snake or toilet auger only clears the blockage in front of you. It doesn’t fix what’s causing it further down the line.
If you notice any of the following, the issue is likely beyond a DIY fix:
In these cases, continuing to snake the drain will only provide temporary relief at best.
If you’ve reached any of the warning signs above, the safest and most effective option is to stop snaking and call a licenced plumber. When the issue goes beyond a simple blockage, professional plumbers use tools that go far deeper than a hand auger. CCTV drain cameras help locate the exact cause, motorised equipment clears tougher obstructions, and high-pressure hydro-jetting can clean the full pipe wall.
If the problem is structural, pipe relining can often repair the damage without digging up your property.
Dealing with a blocked drain or toilet is never fun, but having the right tool, and knowing how to use it properly, can make all the difference. A drain snake or toilet auger is often enough to clear common household blockages quickly, as long as you work slowly, apply gentle pressure, and let the tool do the heavy lifting.
The key is knowing your limits. If the clog doesn’t shift, keeps coming back, or seems deeper in the system, it’s better to stop before causing damage. What starts as a simple blockage can quickly turn into cracked pipes, damaged fixtures, or a much bigger repair if the wrong approach is used.
When in doubt, it’s always safer to bring in a professional. Our team of licenced plumber can identify the root cause and fix the problem properly, saving you time, stress, and repeat blockages down the track.
Got a stubborn blockage? The Plumberoo team is here to help get things flowing again quickly, safely, and without the guesswork. Book today!
A blocked toilet and no plunger in the house is one of those small emergencies that always seems to happen at the worst possible time. The good news is that you can unblock a toilet without a plunger using things you almost certainly already have, and most household blockages clear with a bit of patience rather than brute force.
Here is what actually works, in the order worth trying, plus the things you should never do to a Sydney toilet.
Before you try anything, take the pressure off. If the bowl is full and threatening to spill, lift the cistern lid and push the rubber flapper down to stop more water entering, or close the small isolation tap on the wall behind the toilet. Then wait. A high water level usually drops on its own over ten to fifteen minutes as water seeps past a partial blockage, and a lower bowl is far easier and less messy to work with.
This is the gentlest fix and it works on a surprising number of blockages. Squeeze a generous amount of dishwashing liquid into the bowl, then pour in a bucket of hot, not boiling, water from about waist height. The soap lubricates the blockage and the weight of the water from a height helps push it through. Give it ten to fifteen minutes. The pouring height matters more than people expect, because it adds gentle pressure without you touching anything.
The classic for a reason. Tip about one cup of bicarbonate of soda into the bowl, followed slowly by two cups of white vinegar. It will fizz, and that reaction helps break down organic matter and soap build-up. Leave it for at least half an hour, then follow with a bucket of hot water. This pairing is mild on your pipes, which is exactly why it is a safer first move than any chemical product.
If something is stuck near the top of the trap, an unwound wire coat hanger can reach it. Wrap the end in a cloth and tape it so the bare wire cannot scratch the porcelain, then gently feed it in and work it to dislodge the blockage. Be gentle. This is for reaching a nearby obstruction, not for forcing it, and a hanger is too short and too soft to clear anything deep in the drain.
In a pinch, a toilet brush with a decent head can act like a plunger. Push it into the trap opening and pump it up and down to create suction and pressure. It is not elegant and it is not as effective as a real plunger, but it can shift a soft blockage when nothing else is to hand. Wear gloves and accept that this one is a bit grim.
Do not pour boiling water into the bowl. Porcelain can crack from the sudden temperature change, turning a blocked toilet into a cracked toilet and a much bigger bill. Hot is fine; boiling is not.
Do not reach for caustic chemical drain cleaners either. They are designed for sinks, not toilet traps, they can damage older pipework common in Sydney homes, and they leave a tank of dangerous liquid sitting in the bowl if they fail to clear the blockage, which makes the plumber's job harder and more hazardous.
If the bowl is blocked but you also notice the shower or basin draining slowly, the toilet gurgling when you use other fixtures, or water backing up elsewhere, stop. That is not a simple toilet blockage. It points to a blockage further down the sewer line, often tree roots in older Sydney properties, and no amount of bicarb will fix it. This is the point to call a plumber with a drain camera and an electric eel rather than keep trying at home.
For everyday blockages, hot water with dish soap or a bicarb soda and vinegar treatment will break down most organic matter and paper within thirty minutes. Anything solid, like a toy or a wad of wipes, will not dissolve and needs to be physically removed.
A minor paper blockage often clears on its own as water slowly works past it. A blockage caused by wipes, sanitary products or a foreign object will not, and leaving it risks an overflow.
No. Despite the label, so-called flushable wipes do not break down like toilet paper and are one of the most common causes of blocked toilets and sewer chokes we see across Sydney. Bin them.
Call a plumber if the home remedies fail, if more than one fixture is draining slowly, if the toilet gurgles or water backs up, or if blockages keep returning. Repeat blockages usually mean a deeper problem in the drain that needs a camera inspection.
Tried everything and it is still blocked? Call Plumberoo on (02) 9191 8787. We are on call 24/7 across Sydney, fully licensed (289252c), and if we do not arrive within two hours of an emergency call the call-out is free.
Buy a hot water system that is too small and you will run out mid-shower on a winter morning. Buy one that is too big and you are paying to heat water you never use. Getting the size right is the difference between a system that quietly does its job for a decade and one that annoys you every day. A 250L hot water system suits a lot of Sydney families, but the right answer depends on how many people live in your home and how you all use hot water.
Here is how to size it properly, whether you are choosing storage, continuous flow or a heat pump.
Most hot water complaints are not about a faulty unit. They are about a unit that was the wrong size for the household from day one. Sizing is about matching two things: your peak demand, which is the busiest hot water moment of your day, and your recovery rate, which is how fast the system reheats once it is drained. Get both right and you never think about your hot water. Get either wrong and you notice constantly.
This trips people up. A storage system is sized by how many litres it holds, because it heats a tank in advance and you draw from the reserve. A continuous flow system, sometimes called instantaneous, is sized by how many litres per minute it can heat on demand, because it never stores anything. So comparing a 250 litre tank to a continuous unit by litres alone is meaningless. One number is capacity, the other is flow rate.
As a rough guide for a storage system, the usable capacity you want climbs with the number of people and the type of fuel.
A one or two person household is usually well served by a smaller tank, often in the 125 to 170 litre range for electric, or less for gas because gas reheats faster. A three or four person household, the most common Sydney family, typically lands on a 250L hot water system for electric storage, or around 135 to 170 litres for gas. A five-plus person household often needs 315 litres or more in electric, or a larger gas unit, to avoid running dry during the morning rush.
The reason electric and gas numbers differ so much is recovery. An electric storage unit reheats slowly, so it needs a bigger reserve to cover back-to-back showers. A gas storage unit reheats much faster, so it can get away with a smaller tank for the same household.
The figure that actually decides whether you run out is your peak demand, not your daily total. Picture a winter weekday: three people showering inside an hour, perhaps while the dishwasher runs. That single window is what your system has to cover. A household that showers at staggered times all day can run a smaller unit than a household of the same size that all showers between seven and eight in the morning. When in doubt, size for the busiest hour, not the average day.
Electric storage needs the most capacity because of its slow recovery, and it is cheapest to buy but often dearest to run unless it is on a controlled off-peak tariff. Gas storage and gas continuous recover quickly, so they run smaller for the same demand, and continuous gas in particular gives effectively endless hot water as long as the flow rate suits the number of outlets running at once. A heat pump is an electric system that works like a reverse air conditioner and uses far less power, but it heats more slowly again, so heat pumps are generally sized generously, often 250 to 315 litres, to cover demand while they gently reheat.
Whatever size you choose, the tank itself is kept hot, at 60 degrees or above, to stop Legionella bacteria growing, and a tempering valve brings the delivered temperature down to a safe maximum of 50 degrees at your bathroom taps. That is a national requirement under AS/NZS 3500.4, not a setting you adjust to save space or money.
For most families of four it is a sensible electric storage size, particularly if showers are spread out rather than all crammed into one hour. A family of four that all showers in the same short window, or that has teenagers, may be better with 315 litres or a continuous gas unit.
As a rule of thumb a 250 litre electric storage tank comfortably covers three to four people's daily hot water, assuming normal shower lengths. Long showers, baths and a running dishwasher all draw down the reserve faster.
Continuous flow gives effectively unlimited hot water, which suits households with unpredictable or heavy demand. The trade-off is that flow rate is shared, so running two hot taps at once can reduce pressure. The right choice depends on how many outlets you use at the same time.
A bigger storage tank loses a little more heat standing idle, but the main running-cost driver is the energy source, not the size. Heat pumps and off-peak electric or gas are far cheaper to run than continuous peak-rate electric, regardless of capacity.
Not sure what size suits your household? Call Plumberoo on (02) 9191 8787. We are licensed (289252c), across Sydney, and we will size and quote your hot water system at a fixed price before any work begins.
Most people never think about the shape of the pipe under their toilet until the day they go to replace the toilet and discover that the shiny new one they bought will not connect. The difference between an S-trap toilet and a P-trap toilet is the single most important measurement when you buy a new pan, and getting it wrong means an expensive return or a plumber's bill to adapt it.
Here is how to tell which one you have, and why it matters more than almost any other spec on the box.
Every toilet has a trap: a curved section of pipe that holds a small amount of water to seal sewer gas out of your bathroom. On a toilet, the trap is built into the pan, and the difference between the two types comes down to one thing, the direction the waste exits.
An S-trap exits straight down through the floor. A P-trap exits horizontally out the back, through the wall. That is the whole distinction, and it dictates which toilet will physically fit your existing plumbing.
You do not need to lift anything. Look at where the waste pipe disappears.
If the pipe goes down through the floor behind or beneath the pan, you have an S-trap. This is the most common set-up in older Sydney homes, including most heritage terraces and anything built on a raised floor.
If the pipe runs out the back of the pan and into the wall, you have a P-trap. These are common in newer builds, apartments and concrete slab construction where running waste through the floor is not practical.
Knowing S or P is only half the job. The number that actually matters when you buy a toilet is the set-out, the distance from the finished wall to the centre of the waste pipe.
For an S-trap, measure from the finished wall to the centre of the floor outlet. For a P-trap, measure from the floor to the centre of the wall outlet. Toilets are sold to suit specific set-out distances, and a pan designed for a 140mm set-out will not sit correctly over a 100mm outlet. This single measurement causes more failed toilet swaps than anything else, so write it down before you go shopping.
If you are simply replacing a like-for-like toilet, you want to match the existing trap type and set-out as closely as possible to avoid moving any pipework. If the numbers do not match, you are not stuck, but you are now into either an adjustable pan connector or relocating the waste, which is a bigger job.
This is also why buying a toilet online without checking your set-out is risky. The photos rarely make the trap type obvious, and a beautiful wall-faced pan is useless if your outlet is in the floor and the model only suits a wall outlet.
Yes, within reason. A licensed plumber can fit a pan connector or adjust the waste to convert between trap types or to shift the set-out by a modest amount. It is routine work, but it is plumbing work: cutting and resealing a waste connection has to be watertight and gas-tight, and a poor seal lets sewer odour into the room. If your dream toilet does not match your existing outlet, this is the path, and it is worth getting a quote before you commit to the pan.
Neither is better. They suit different building types. S-traps suit floor-waste plumbing common in older homes; P-traps suit wall-waste plumbing common in newer builds and apartments. The right one is whichever matches your existing outlet.
Some modern pans are sold with an adjustable connector that can accommodate a range of set-out distances and, in some cases, both floor and wall outlets. They cost a little more but reduce the risk of buying the wrong model. Always check the stated set-out range before you rely on one.
Replacing a toilet involves disconnecting and resealing the waste and water supply. A faulty seal can leak water or let sewer gas into the room, and in New South Wales this is licensed plumbing work. It is a job worth handing to a licensed plumber to get the seal right the first time.
For a floor outlet (S-trap), measure from the finished wall to the centre of the waste pipe. For a wall outlet (P-trap), measure from the floor to the centre of the outlet. Take the measurement with you when you buy.
Replacing a toilet and not sure what will fit? Send us a photo or call Plumberoo on (02) 9191 8787. We are licensed (289252c) and across Sydney, and we will tell you exactly what set-out you need.
If your shower has started running lukewarm no matter how far you turn the tap, or scalding hot for no reason, there is a small brass valve near your hot water unit that is almost certainly the cause. It is called a tempering valve, and most Sydney homeowners have never heard of it until it fails.
A tempering valve is a legal requirement on almost every domestic hot water system in Australia, and when it stops working it affects every hot tap in the house. Here is what it does, why it matters, and how to tell when yours needs replacing.
Your hot water system stores water hot, but the water that reaches your bathroom taps has to be cooler. A tempering valve sits on the outlet of your hot water unit and blends a measured amount of cold water into the hot supply, so the water leaving for your bathroom never exceeds a safe temperature.
It does two jobs at once. It protects your household from scalding, particularly young children and older people whose skin burns faster. And it lets the cylinder itself stay hot enough to kill dangerous bacteria. Without a tempering valve you are forced to choose between safe taps and a safe tank. You cannot have both.
The rules sit in the national plumbing standard, AS/NZS 3500.4, and they are not optional. Stored hot water has to be kept at 60 degrees or above so that Legionella bacteria cannot multiply in the tank. At the same time, water delivered to any fixture used for personal hygiene, your shower, bath and bathroom basin, must not exceed 50 degrees. The gap between those two numbers is exactly what a tempering valve manages. You can read the temperature rules in the regulator's explainer on AS/NZS 3500.4 heated water services.
The 50 degree ceiling drops to 45 degrees in higher-risk settings such as early childhood centres, schools, aged care and healthcare facilities, where a thermostatic mixing valve is used instead. For a standard Sydney home, 50 degrees at the bathroom outlet is the number that applies.
A tempering valve has moving parts and a temperature-sensitive element inside it, and it wears out. The symptoms are easy to miss because people blame the hot water system itself. Watch for water that has gone lukewarm at every tap even though the unit is heating normally, water that suddenly runs much hotter than it used to, hot water that fluctuates between hot and cold during a single shower, or a noticeable drop in how much usable hot water you get.
If you have ruled out a flat-out hot water failure and the temperature is simply wrong or unstable, the valve is the most likely culprit. It is a far cheaper fix than a new cylinder, which is one reason it pays to diagnose it correctly rather than replacing the whole system.
These two get confused constantly. A tempering valve is the standard fitting for domestic homes. It blends to a set temperature and is accurate enough for residential use. A thermostatic mixing valve, or TMV, is a more precise device that reacts faster to changes in supply and is required in the higher-risk settings mentioned above. A TMV also needs annual servicing by a licensed person, whereas a domestic tempering valve does not. For the vast majority of Sydney houses, a tempering valve is the correct and compliant choice.
A tempering valve is an inexpensive part, but it is fitted with a licensed plumber's labour and often replaced at the same time as other valves on the unit. As a guide, supply and install typically lands somewhere in the $200 to $400 range for a straightforward swap, though access and the condition of the surrounding pipework can change that. Plumberoo quotes a fixed price before any work starts, so you are never surprised by the invoice.
Expect a tempering valve to last around five years before it drifts out of calibration. Many manufacturers warrant them for a similar period, which is a useful prompt: if your unit is more than five years old and the temperature has gone strange, the valve is the first thing to check.
No. Work on a hot water system is licensed plumbing work in New South Wales, and a tempering valve that is fitted or set incorrectly can deliver scalding water to a child's bath. It is exactly the kind of small job where the consequences of getting it wrong are serious. Plumberoo is fully licensed (NSW Fair Trading licence 289252c), and a valve replacement is usually a same-visit job. If we do not arrive within two hours of an emergency call, the call-out fee is free.
Look at the pipework on top of or beside your hot water unit. A tempering valve is a small brass body, usually with a coloured cap or adjustment screw, sitting where the hot outlet meets a cold inlet. If your home was built or had its hot water replaced in the last couple of decades, you almost certainly have one.
No. Lowering the tank below 60 degrees creates a Legionella risk inside the cylinder. The correct approach is to keep the tank hot and let the tempering valve bring the delivered temperature down to a safe level.
A tempering valve that has failed open lets too much cold water through, so every hot tap runs lukewarm even though the unit is working perfectly. This is one of the most common signs of a worn valve.
A standard domestic tempering valve does not require scheduled servicing, but it should be replaced when it drifts out of range. A thermostatic mixing valve in a commercial or high-risk setting is different and does require annual servicing by a licensed person.
Lukewarm or scalding water at the taps? It is usually a five-minute diagnosis. Call Plumberoo on (02) 9191 8787. We are licensed (289252c), available 24/7 across Sydney, and quote a fixed price before we start.
Most "air con is leaking water" guides treat it as an HVAC problem. They're missing the point. In around 75% of cases the cause is a blocked or improperly installed condensate drain - which is plumbing, not refrigeration. This guide explains the six real causes of an AC water leak, where the water is supposed to go, why Sydney coastal homes are especially vulnerable, and how to tell whether you need a plumber, an HVAC technician, or both.
It's a hot afternoon in Maroubra. You walk into the living room and there's a brown circle expanding across your ceiling. The split-system air con upstairs has been running all day, and now water is dripping onto the rug.
Before you panic-Google and book the first air-con company that returns your call, here's what's actually happening - and why the right first call is often a plumber, not an HVAC tech.
Every air conditioner is, in part, a dehumidifier. When warm humid air passes over the cold evaporator coil inside the indoor unit, the moisture in the air condenses on the coil - exactly the same way water beads on a cold glass on a humid day. That water has to go somewhere.
In a healthy system, the water collects in a tray (the condensate pan), runs out through a small pipe (the condensate drain), and exits the building - either dripping outside, draining into a stormwater point, or piped into your home's waste plumbing under AS/NZS 3500.
In an unhealthy system, that water ends up on your ceiling, in your wall, or pooling under the indoor unit. Here's why.
This is by far the most common cause, and the one most articles understate. The condensate drain is a small-diameter pipe (typically 16-25mm) that runs from the indoor unit's drip tray to an outside discharge point. Over time it accumulates:
Once the drain is blocked, the drip tray overflows and water finds the path of least resistance - usually straight down through your ceiling. This is a drainage problem. It's solved by clearing the line (a plumbing job), not by recharging refrigerant or replacing components inside the AC unit.
After 8-12 years, the metal or plastic drip tray inside the indoor unit can crack, warp, or rust through. Water bypasses the drain entirely and falls straight into the unit cavity. Replacement is an HVAC job, but the diagnosis often happens during a plumber's drain inspection.
A condensate drain needs gravity to work - it must fall at least 1:100 from the indoor unit to the discharge point. If the line was installed too flat, or with a low point that holds water, you'll get intermittent overflow even when the line is "clear". This is a common issue in retrofit installs in older Eastern Suburbs apartments where the drain has been threaded through walls and across roof spaces.
If airflow over the coil drops - usually because the filter is clogged or the fan is failing - the coil temperature can drop below freezing. Ice forms on the coil instead of running off as water. When the unit cycles off, the ice melts all at once, and the drip tray overflows faster than the drain can handle.
Solution: clean or replace the filter, and have an HVAC technician check fan operation.
Same mechanism as a frozen coil, but caused by a slow refrigerant leak rather than an airflow problem. If your AC is also blowing weaker than usual or struggling to cool, low refrigerant is likely. This needs an HVAC technician - refrigerant work is licensed and you can't DIY it.
Less common, but in older Eastern Suburbs homes with ducted systems, condensate drains often run through wall cavities and ceiling spaces. They can be knocked loose by tradespeople doing unrelated work, eaten by rats, or crushed by storage in the roof. If a previously well-functioning AC suddenly starts leaking after work has been done in your home, this is a likely cause.
Under AS/NZS 3500, condensate drains must discharge to one of:
They cannot legally discharge:
A surprising number of Eastern Suburbs AC installations don't comply, particularly in older apartment buildings where multiple split systems have been retrofitted over decades. If your AC has been leaking, getting a plumber to inspect the condensate discharge is a good chance to bring the install up to code at the same time.
The leak point is usually the indoor wall unit, and water tends to drip from the bottom edge of the unit onto whatever is below - floor, furniture, or in the worst case running down the wall behind the plasterboard. The condensate drain is usually a short, accessible run to an outside wall.
The indoor fan unit is usually in the roof space or under the floor. When it leaks, water can pool in the roof void for hours before showing up on the ceiling below - often as a brown stain or sagging plasterboard. The condensate drain is a longer, more complicated run that may pass through cavities and walls before discharging.
Older units often drain straight outside through a small hole. Leaks usually mean the unit is no longer level (often after vibration over years), or the drain hole is blocked. Often cheaper to replace than repair.
Home insurance treatment of AC water leaks varies. As a general rule, sudden damage (a drain that was clear yesterday and is blocked today) is usually covered. Gradual damage (a drain that's been slowly leaking for months) often isn't. Document the moment you noticed the leak, call your plumber promptly, and notify your insurer the same day.
If water has been pooling in a roof cavity or wall, ask the plumber to check for mould development. Mould remediation is a separate (and expensive) job that often isn't covered by standard policies if it's been growing for weeks.
Yes, in some circumstances. Reverse-cycle outdoor units produce condensate when running in heating mode (winter) and need to drain it. Cooling-only units shouldn't drip from the outdoor unit. If you're unsure, check whether the dripping correlates with cooling vs heating.
For a simple split system with an accessible drain, you can sometimes clear it with a wet/dry vacuum attached to the outdoor discharge end. For ducted systems or anything inside a wall, leave it to a plumber - you risk disconnecting the line and turning a minor blockage into a major water damage event.
A standard condensate drain clear is usually $150-$300. Replacing a drip tray or fan motor is $400-$800. Refrigerant work varies widely. If water damage to ceilings or walls has occurred, that's an additional cost - hence the value of acting fast.
We handle the plumbing side of AC water leaks: condensate drains, discharge compliance, water damage assessment, and pipe relining where the drain runs through inaccessible spaces. For refrigerant work and mechanical AC servicing, we work alongside trusted HVAC partners across the Eastern Suburbs.
Air con leaking water through your ceiling? Don't wait for the plaster to give way. Call Plumberoo on (02) 9191 8787 - same-day service across the Eastern Suburbs, $0 call-out, and a clear quote before we touch anything.
Choosing a hot water system in 2026 is not the same decision it was even three years ago. NSW is moving away from gas in new homes, federal and state rebates can knock thousands off a heat pump install, and electricity tariffs have shifted what "cheapest to run" actually means. This guide breaks down the four main system types, the real 2026 running costs, current NSW rebates, and what a working plumber actually recommends to Eastern Suburbs customers right now.
Every week, we get the same question from customers in Bondi, Coogee, Bellevue Hill and across the Eastern Suburbs: "My hot water just died - what should I replace it with?" The honest answer used to be straightforward. In 2026, it's anything but. Here's how to make the right choice for your home, your household size, and the way the energy market is heading.
A big insulated tank with an electric heating element. Cheap to buy (typically $700-$1,800 for the unit, plus installation), simple to install, works anywhere. The catch: running costs are now the highest of any system type on a standard tariff. On off-peak electricity it's competitive, but most modern households now use hot water across the day, not just overnight.
Heats water on demand (continuous flow) or stores it in a tank, fired by natural gas or LPG. For decades, this was the default for Sydney homes. In 2026, the picture has changed significantly.
NSW is following Victoria's lead in winding down gas. The City of Sydney has banned gas in new residential developments since January 2026, and the broader NSW government has signalled the gas network is being phased down, not expanded. If you replace gas with gas today, you're likely installing your last gas unit - and gas prices are rising faster than electricity as the network depreciates.
Roof-mounted panels heat water directly (or heat a fluid that's pumped to a tank). Brilliant in theory; complicated in practice. Sydney's climate suits it well, but the upfront cost is high ($4,000-$8,000+ installed) and most systems need an electric or gas booster for cloudy weeks.
For most homeowners considering "the renewable option" in 2026, a heat pump combined with rooftop solar PV is now a better deal than dedicated solar hot water - cheaper to install, less roof real estate, and the solar PV can power the rest of the house too.
A heat pump works like a reverse-cycle air conditioner: it extracts heat from the surrounding air and uses it to warm water in an insulated tank. It runs on electricity but uses around 70% less of it than a standard electric storage system, because it's moving heat, not generating it.
In 2026, heat pumps are the system the government, the industry and the plumbing trade are pushing customers towards. They're cleaner, dramatically cheaper to run, and eligible for the largest rebate stack of any option. For an Eastern Suburbs home with mild winters, they're close to a no-brainer.
This is where heat pumps pull dramatically ahead. There are two main programs an Eastern Suburbs homeowner can stack right now:
Eligibility rules change, so we check the current rebate position for every customer before quoting. Don't assume - and don't buy a system from a retailer before confirming rebates are included in the price.
Heat pumps are sensitive to ambient air temperature - their efficiency (called Coefficient of Performance, or COP) drops in cold weather. The good news: Sydney's climate is unusually well-suited to them.
Get this wrong and you'll either run out of hot water mid-shower or pay to heat water you never use. As a rough guide:
Heat pumps need slightly larger tanks than electric for the same household size, because they recover heat more slowly. Don't let a salesperson talk you into a 170L heat pump for a family of four "because it has a fast recovery rate" - you'll be doing cold-rinse loads of washing within three months.
Sticker price isn't install price. The most common surprises in an Eastern Suburbs replacement:
We don't take sales commissions from any manufacturer, which means our recommendations are based on what actually lasts in Sydney conditions and what's easiest to get parts for when something goes wrong.
A general rule: if your unit is over 10 years old and needs a $500+ repair, replace it. Newer systems pay back in efficiency within 2-3 years, and modern rebates make the gap smaller than it used to be. If your unit is under 7 years old, repair is almost always the better call - especially for electric storage units where element and thermostat replacements are quick and cheap.
A like-for-like replacement (e.g., old gas to new gas in the same spot) usually takes 2-4 hours. Switching system types (e.g., gas to heat pump) typically takes a full day because of the pipe re-runs and electrical work involved.
No. In NSW, hot water installations must be done by a licensed plumber, and any electrical work by a licensed electrician. Self-installation voids warranty, voids insurance, and is illegal.
No. Rebates are at their highest right now and there's no benefit to waiting. If your current gas unit dies, replacing it with another gas unit means installing a system that may have to be replaced again within 10 years as the network winds down.
These are great for boiling water at the kitchen sink but aren't a whole-home solution. They're a complement to your main system, not a replacement.
Hot water dead, or planning a future-proof upgrade? Call Plumberoo on (02) 9191 8787 for a free in-home assessment. We'll quote on the right size, the right system, and the rebates you're actually eligible for - no commissions, no upselling.
Standing ankle-deep in soapy water is one of those classic Sydney problems - particularly in older Eastern Suburbs apartments and terrace houses where the drainage hasn't had a serious look in decades. This guide walks you through what's actually blocking your drain, the five DIY methods that work (in the right order), the three things you should NEVER do to a Sydney drain, and how to tell when it's not the shower at all - it's your sewer.
Before you reach for the bottle of caustic drain cleaner under the sink - stop. There's a very good chance that what you're about to do will damage your pipes, scratch your enamel, and not actually clear the blockage. Especially if you live in a heritage Paddington terrace, a 1960s Maroubra brick home, or a Bondi apartment building with cast iron stacks.
Here's how to do this properly.
Before you do anything, run two quick checks. They'll tell you whether you're dealing with a 5-minute fix or a "call the plumber tonight" emergency.
Try the basin in the same bathroom, then flush the toilet. If only the shower is slow, you're almost certainly looking at a localised blockage in the shower waste - hair, soap and skin cells clogging the P-trap or the short section of pipe just below it. Good news: this is the easy version.
If the basin is also slow, or the toilet bubbles when the shower drains, stop everything. This is not a shower-drain problem - it's a sewer line problem. The blockage is downstream of all your fixtures and you've got tree roots, a collapsed section, or a fat/grease build-up in your main drain. Continuing to use water in this state can cause a sewage backflow into the lowest fixture in your home (usually the shower itself). Call a plumber.
In Sydney homes, three culprits cause around 95% of shower blockages:
Less common, but worth knowing: small toys, jewellery, bottle caps, and (in heritage homes) bits of corroded pipe scale that have flaked off the inside of cast iron drains.
A kettle of just-boiled water poured slowly down the drain can dissolve soap scum and shift light blockages. WARNING: Don't do this if you have a porcelain or enamel shower tray - the thermal shock can crack it. Don't do this on PVC drains if you've just had your hot water on either, as combined heat can soften older pipe joints.
It's gross. It's also the single most effective DIY method for a typical shower blockage. Remove the drain cover (usually two screws or a lift-off grate), then use a bent wire coat hanger, a plumbing zip-tool (cheap at any hardware store), or even your gloved fingers to fish out the hair clump. You'll be amazed - and a little horrified - by what comes up.
Fill the shower with 5-10cm of water so the plunger forms a seal. If your shower has an overflow, block it with a damp cloth. Plunge vigorously for 30-60 seconds. The combination of pressure and suction can break up softer blockages that hair removal didn't catch.
A classic for a reason. Pour half a cup of bicarb soda down the drain, follow with a cup of white vinegar, and cover the drain (a wet cloth works) to force the foaming reaction down rather than up. Leave for 15-30 minutes, then flush with hot (not boiling) water. This works on soap scum and mild build-up. It's also pH-neutral by the end, so it won't damage any pipe material in Sydney homes.
If you have access to a shop vac, set it to "wet", seal the hose around the drain, and switch on. The suction is significantly stronger than a plunger and can often pull blockages back up the way they came rather than pushing them deeper.
This is the big one. Caustic drain cleaners - the ones with sodium hydroxide or sulphuric acid - are murder on older pipework. In Eastern Suburbs heritage homes (think Paddington, Surry Hills, parts of Bondi Junction and Darlinghurst), drain stacks are often original cast iron from the 1900s-1940s. These chemicals strip the protective lining and accelerate corrosion massively. Even in modern PVC, repeated use weakens joints. And if the chemicals don't clear the blockage, the next plumber to work on your drain is now exposed to caustic water that splashes back when they snake the line.
It'll scratch the enamel on your shower tray on the way in. It'll punch through the inside of older galvanised drains. And it's rarely long enough to reach the actual blockage, which is usually 30-60cm down the pipe at the first bend.
A partial blockage becomes a full blockage. Standing water sits against pipe walls, accelerating corrosion. Soap scum builds on top of soap scum. And in shared apartment plumbing, your slow drain can become someone else's overflowing one.
If you've tried the methods above and the drain is still slow, it's time to call us. Here's what we actually use - none of which you can DIY:
Usually one of three reasons: long hair in the household, hard water in your area, or a pre-existing pipe issue (slight pipe collapse, scale build-up, or a poorly designed drain run with too many bends). If you're unblocking it more than twice a year, the underlying drain probably needs a professional clean.
No - and no oils, no fats, no grease anywhere in the bathroom drainage. They cool, solidify, and become the glue that holds hair clumps together.
Yes. Enzyme-based and bacterial drain treatments are slow but pipe-safe. They're a good monthly maintenance option, particularly for older homes where caustic chemicals are a no-go.
A smelly drain is often a different problem: a dry P-trap (letting sewer gas back up), biofilm on the pipe walls, or a venting issue. If the drain isn't slow but smells bad, it's worth a plumber visit before it becomes worse.
Tried everything and the drain is still blocked? Call Plumberoo on (02) 9191 8787 - blocked drain service starts from $99+GST, with same-day appointments across the Eastern Suburbs and a fixed quote before any work begins.
A burst pipe in a Sydney home rarely announces itself with a dramatic spray. Most of the time it starts as a quiet hiss behind a wall, a damp patch on a ceiling, or a water bill that mysteriously doubles. This guide walks you through the seven warning signs, the 60-second water meter test any homeowner can run, and the exact steps to take in the first 15 minutes if you suspect a leak.
If you live in one of Sydney's Eastern Suburbs, your home has likely seen a few decades of plumbing - and that's the problem. Federation cottages in Paddington, Art Deco apartments in Bondi, and post-war homes in Maroubra all share one thing in common: ageing copper, brass and (in some cases) galvanised steel pipework hidden behind walls, under slabs, and buried in the garden. Add coastal salt air, reactive clay soils, and Sydney's long, hot summers, and burst pipes are not a question of "if" but "when".
The good news? Most bursts give you warning signs days, weeks, or even months before they fail catastrophically. Here's how to spot them - and what to do the moment you do.
This is the most obvious sign, and the one most people notice last - because by the time water shows up on the surface, the leak has often been going for weeks. Look for discoloured patches on walls or ceilings, paint that's bubbled or peeled, skirting boards that have warped, or tiles that feel soft underfoot. In double-storey homes, water often travels along a beam before dropping, so the wet patch is rarely directly under the leak.
If your shower has gone from a confident stream to a sad trickle - and the change happened overnight - water is escaping somewhere it shouldn't. A single fixture losing pressure could be a tap aerator. But every fixture losing pressure at once almost always means a burst in the main line or a major leak between the meter and the house.
Brown, yellow or cloudy water can mean a burst pipe has let dirt and rust into the line, or that the pressure drop has stirred sediment. In older Eastern Suburbs homes with copper pipework, blue-green water can indicate copper corrosion - often a precursor to pinhole leaks. Don't drink it, and don't ignore it.
This is the single most useful test any homeowner can do, and it takes 60 seconds:
Pipes shouldn't talk. A constant hiss, an intermittent drip behind plasterboard, or a banging sound when no taps are in use (water hammer) all point to a compromised line. Walk around your home at night when the street is quiet, put your ear to suspect walls, and listen.
Sydney Water reads meters quarterly. If your bill jumps by 30%, 50% or more without any change to your household, you're paying for water that's leaking into the ground, your slab, or your wall cavity. A small pinhole leak can waste 30,000 litres a quarter - enough to flood a small swimming pool.
A musty smell that won't go away, mould appearing in unexpected places (corners of bedrooms, behind furniture), or a tile floor with one suspiciously warm patch can all indicate slab leaks - bursts in the pipes that run beneath your concrete foundation. These are particularly common in homes built between the 1960s and 1980s. Slab leaks are not a DIY job; they need professional detection.
Plumbing failures aren't random - certain conditions make them dramatically more likely. If your home ticks any of these boxes, you should be especially vigilant:
Not every burst looks the same. Knowing what's in your walls helps you spot trouble earlier:
DIY detection has its limits. A licensed plumber can identify leaks without cutting a single wall using:
Plumberoo's Leak Detection Specialist, Stephen, runs every one of these methods - meaning we find the problem first time, without unnecessary damage to your home.
Every adult in your home should know where the mains shut-off is. In most Eastern Suburbs properties it's near the front boundary, in a green plastic meter box. Turn the tap clockwise until it stops. This alone can prevent thousands of dollars in damage.
If water is approaching power points, light fittings, or your switchboard, isolate the affected circuits at the main switchboard. Never stand in standing water near electrical equipment.
Drain the remaining water in the system through the lowest taps in the home. This reduces pressure on any other weak points and minimises continuing damage.
Take photos and short videos of every wet surface, every damaged item, and the source of the leak if visible. Note the time. Most home insurance policies require evidence of "sudden and unexpected" damage to cover repairs.
Don't wait for it to "settle". A burst pipe doesn't fix itself, and ongoing water damage gets worse - and more expensive - by the hour. Plumberoo is on call 24/7 across the Eastern Suburbs with an average response time of 1 hour 53 minutes.
A 1mm pinhole leak under mains pressure leaks around 9,000 litres per day. A larger burst can release 50,000+ litres before being shut off. That's why response time matters.
Most policies cover sudden, accidental water damage from a burst pipe - but not gradual leaks that were ignored, or damage from poor maintenance. Document everything, call your plumber immediately, and notify your insurer the same day.
For a tiny pinhole on an accessible copper line, a pipe-repair clamp can buy you a few hours. It's not a fix - it's first aid. Anything inside a wall, under a slab, or on a pressurised mains line must be repaired by a licensed plumber.
Soggy patches in the lawn, unusually green grass over a buried line, water pooling at the kerb, or the meter test failing with all internal taps off - all point to an underground burst between the meter and the house.
Suspect a burst pipe? Don't wait for the damage to spread. Call Plumberoo on (02) 9191 8787 - we're on call 24/7 across Sydney's Eastern Suburbs, with $0 call-out and same-day service from Bondi to the western suburbs.