Open 24/7! Servicing all of Sydney’s Eastern Suburbs
Our Average Response time is: 1hr 53min 47sec
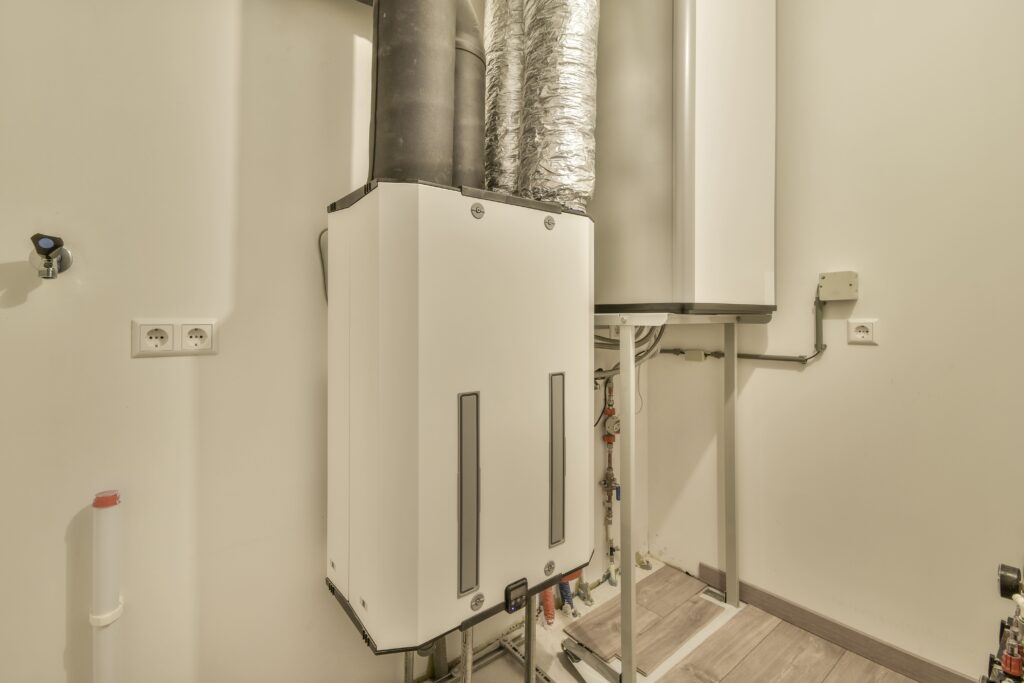
No one wants to be caught without hot water, but when it's time to replace your system you need to know how much to budget for. The cost of installing a new hot water system in Australia varies widely depending on the type of system you choose, its size, and the complexity of the installation.
While some systems (like electric hot water heaters) are the most affordable to install upfront other options (like heat pumps) can offer significant long-term energy savings. In many cases, government rebates can also help reduce the initial investment too. The right choice ultimately comes down to your budget, household size, energy usage and long-term running costs.
In this guide, we'll break down hot water system installation costs by system type, explain the factors that influence pricing, outline what's typically included in a professional installation quote, and explore available rebates to help you make an informed decision before replacing or upgrading your hot water system.
If you've started comparing hot water system quotes, you've probably noticed the prices can vary dramatically. That's because every installation is different, and several factors determine what you'll actually pay.
The type of hot water system you choose will have one of the biggest impacts on the overall cost. Electric storage systems are usually the most budget-friendly option upfront, while gas continuous flow, heat pump and solar systems typically come with a higher initial price tag.
That said, a higher upfront cost doesn't always mean a more expensive system long term. Energy-efficient options like heat pumps and solar systems can help reduce ongoing energy bills and may also qualify for government rebates.
The right hot water system size depends on how many people live in your home and how much hot water you use each day. A larger family may need a bigger storage tank or a higher-capacity continuous flow system, which can increase the purchase and installation cost.
Choosing the right size is important. A system that's too small may leave you running out of hot water, while one that's too large could mean you're paying more than necessary.
Some installations are straightforward, while others require additional work before your new system can be connected. Replacing an old unit with a similar model in the same location is usually the simplest and most affordable option.
However, costs can increase if you're changing system types or relocating the unit. For example, switching from electric to gas may require a new gas line, while installing a heat pump may require additional space, drainage or a suitable outdoor base.
Additional work may include:
💡The more changes required, the more time and materials are involved.
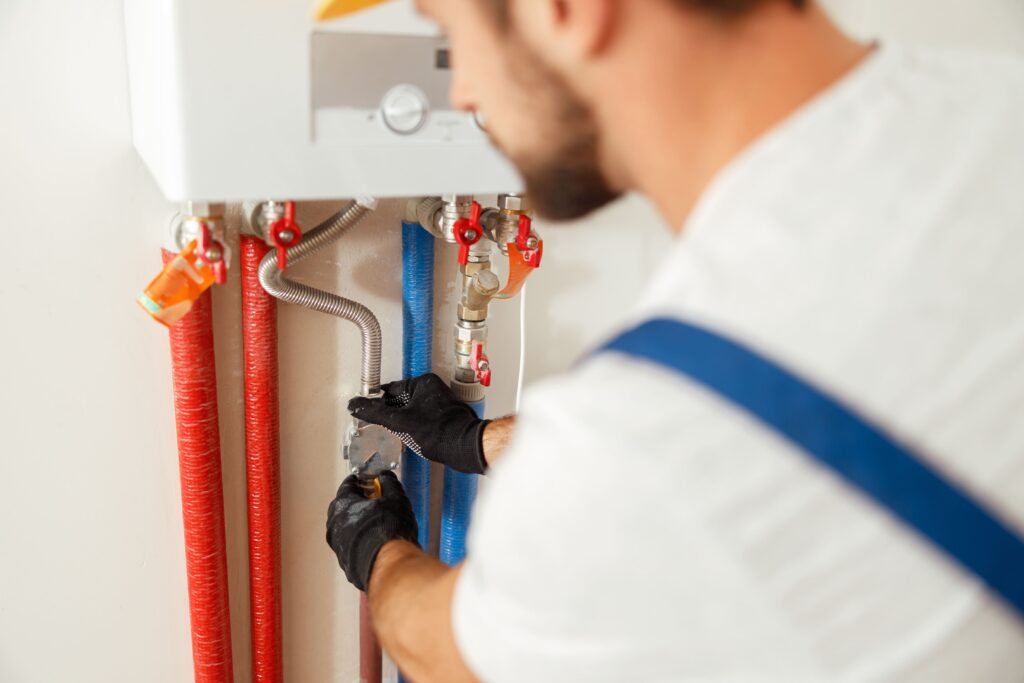
Your home's current setup can make a big difference to installation costs. Newer homes may already have the necessary connections in place, while older properties may need upgrades to bring the system up to current safety and compliance standards.
Depending on your installation, this may include adding components such as tempering valves, pressure limiting valves or isolation valves to ensure your system operates safely and meets Australian requirements.
Professional installation involves more than simply connecting a new unit. Your plumber needs to assess your home, complete the installation safely and ensure everything is working correctly.
Labour costs will depend on the complexity of the job, how long the installation takes and whether additional licensed trades, such as electricians or gas fitters, are needed. Emergency or after-hours replacements may also come with additional fees.
The easier your hot water system is to reach, the quicker and more straightforward the installation is likely to be. Difficult access areas, such as tight cupboards, apartment buildings, roof spaces or properties with long pipe runs, can add extra time and labour to the job.
When replacing an existing hot water system, your old unit will usually need to be disconnected, removed and disposed of properly. Many plumbers include this in their installation quote, but it's always worth confirming before booking. Larger storage tanks or older systems may involve additional disposal costs depending on the requirements.
Choosing an energy-efficient hot water system could help reduce your upfront costs through available government rebates and incentives. Heat pumps and solar hot water systems, in particular, may be eligible for financial support depending on your location and the current programs available.
Before choosing your new system, it's worth checking what rebates you may qualify for or asking your plumber if they can help guide you through the process.
The type of hot water system you choose will have the biggest impact on both your upfront installation cost and your long-term running expenses. While electric systems are generally the most affordable to install, investing more upfront in a heat pump or solar system can significantly reduce your energy bills over time.
| Hot Water System | Typical Installed Cost | Running Costs | Best Suited For | Key Considerations |
| Electric Storage | $1,000–$3,000 | High | Apartments, smaller households and like-for-like replacements | The most affordable system to buy and install, making it a popular choice for budget-conscious households. It's also one of the quickest and easiest systems to replace. However, because it continuously heats and stores water, it typically has the highest running costs over time. |
| Gas Storage | $2,000–$3,000 | Medium | Homes with an existing natural gas connection | A cost-effective option if your home already has gas connected. Gas storage systems generally cost less to run than electric storage systems while providing a reliable supply of hot water. |
| Gas Continuous Flow | $1,500–$5,500 | Medium-Low | Larger households, high hot water demand and homes with limited space | Heats water only when you need it, eliminating the energy losses associated with storing hot water. Ideal for busy households, but installation costs can increase if new gas lines or upgrades are required. |
| Heat Pump | $2,500–$8,500 | Low | Energy-conscious households looking to reduce electricity bills | One of the most energy-efficient hot water systems available, using heat from the surrounding air instead of generating it directly. While the upfront cost is higher, lower running costs and available government rebates can make it an excellent long-term investment. |
| Solar Hot Water | $4,500–$8,000+ | Very Low | Homes with good roof access seeking maximum long-term savings | The highest upfront investment, but also the lowest ongoing running costs. Solar collectors provide most of your hot water, while an electric or gas booster ensures reliable performance during cloudy weather. Government rebates may help offset the initial installation cost. |
Not sure which system suits your household? Book a free site assessment and Plumberoo will size and quote your installation. Call (02) 9191 8787.

If you're installing an energy-efficient hot water system, such as a heat pump or solar hot water system, you may be eligible for government rebates that can reduce the upfront installation cost. In many cases, eligible NSW households can access both federal and state incentives, making these premium systems much more affordable than their initial price suggests.
The Australian Government's Small-scale Renewable Energy Scheme (SRES) provides financial incentives for eligible heat pump and solar hot water systems through Small-scale Technology Certificates (STCs).
Rather than applying for the rebate yourself, the value of these certificates is usually applied by your installer as an upfront discount on your quote, reducing the amount you pay before installation.
The number of STCs available depends on factors such as:
In addition to the federal STC scheme, eligible NSW households may also qualify for discounts through the NSW Energy Savings Scheme (ESS) when upgrading to a more energy-efficient hot water system.
| Upgrade | Potential Rebate |
| Replace an electric water heater with a heat pump | Up to $640 |
| Replace a gas water heater with a heat pump | Up to $330 |
| Replace an electric water heater with a solar hot water system (electric booster) | Up to $900 |
| Replace a gas water heater with a solar hot water system (gas booster) | Up to $550 |
Rebate amounts are indicative only and can vary depending on your postcode, the installer you choose and the eligible system installed.
Read our complete Heat Pump Hot Water Systems guide to learn how they work, how much they cost, what rebates you could be eligible for and whether they're the right choice for your home.
When your hot water system starts playing up, the biggest question is whether it's worth repairing or if it's time for a replacement. The answer depends on the age of your system, the type of fault and how much the repair is likely to cost.
A hot water system repair is often the most cost-effective solution if your hot water system is relatively new and the problem is isolated to a replaceable component.
In many cases, it's worth repairing your system if:
A professional plumber can quickly diagnose the fault and advise whether a repair is likely to restore reliable performance.
If your hot water system is nearing the end of its lifespan or repairs are becoming more frequent, replacement is often the smarter financial decision.
You should consider replacing your system if:
Installing a new, energy-efficient system may cost more upfront, but it can improve reliability, reduce running costs and provide greater peace of mind for years to come.
Read More: Burst Hot Water System? Here's What To Do
Whether you're repairing or replacing your system, choosing the right size is just as important as choosing the right type. A system that's too small can leave your household without enough hot water during busy periods, while an oversized system may use more energy than necessary by heating water you don't need.
| Household Size | Recommended System |
| 1–2 people | Small storage tank or compact continuous flow system |
| 3–4 people | Medium-capacity storage system or continuous flow unit |
| 5+ people | Large storage tank or high-capacity continuous flow system designed for multiple simultaneous users |
Not Sure What Size Hot Water System You Need? Read our Hot Water System Sizes guide to find the right capacity for your household and avoid paying for more hot water than you need.
Not all installation quotes are created equal. While it can be tempting to choose the cheapest option, a lower price doesn't always mean better value. A comprehensive installation quote should cover everything required to safely install your new hot water system and ensure it complies with Australian standards.
| Standard Inclusions | Items That Can Add To The Quote |
| Supply and delivery of the new unit | New gas line where none exists |
| Removal and compliant disposal of the old system | Roof penetrations for solar collectors |
| Connection to existing plumbing, gas or electrical | Extended pipework for a relocated unit |
| Tempering and isolation valves where required | Drainage connection for heat pump condensate |
| Compliance certificate and commissioning | Electrical or gas capacity upgrades |
Some installation components aren't optional, but are required by law. For example, if your existing system doesn't meet current plumbing regulations, your installer may need to fit items such as a tempering valve, isolation valves or other safety devices to ensure the installation complies with Australian Standards. While these additions may increase the upfront cost, they're essential for the safe operation of your hot water system and help protect your manufacturer's warranty.
When comparing installation quotes, look beyond the total price. A detailed quote should clearly outline:
A transparent, itemised quote makes it much easier to compare installers and gives you confidence that there won't be any unexpected costs once the installation is underway.
The cheapest hot water system isn't always the most cost-effective, and the most expensive isn't always the best fit. The right choice comes down to balancing your upfront budget with your household's hot water needs, energy efficiency goals and long-term running costs.
Whether you're replacing a failed system or planning an upgrade, understanding what's included in the installation cost, and comparing complete, like-for-like quotes, will help you avoid unexpected expenses and choose a system that delivers reliable performance for years to come.
If you're ready to install a new hot water system, our Plumberoo plumbers can recommend the best option for your home, explain any available rebates and provide a transparent quote with no hidden surprises. A little expert advice now can help you save money and enjoy dependable hot water well into the future.
When something goes wrong with your drains, the real problem is usually out of sight, and that’s exactly what makes it so frustrating to diagnose.
That’s where CCTV drain camera inspections come in. Instead of relying on guesswork or invasive digging, this method allows a licenced plumber to see directly inside your pipes and identify the cause of the problem in real time. It’s a precise, non-invasive way to diagnose issues at the source and avoid unnecessary repairs or disruption. For homeowners dealing with recurring blockages, unpleasant odours, or slow-draining fixtures, an inspection is often the quickest way to get clarity on what’s happening beneath the surface.
In this article, we’ll explore what CCTV drain inspections can uncover, when they’re the right solution, and what typically happens once the issue has been identified.
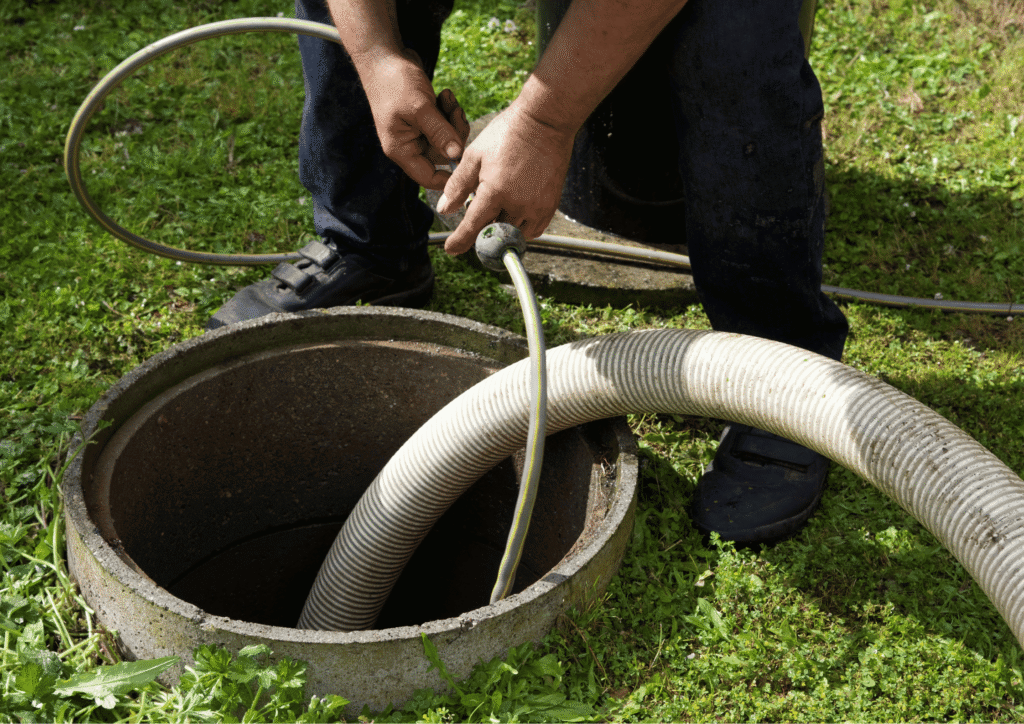
A CCTV drain camera is a waterproof HD camera mounted on a flexible cable (push-rod system) or, for larger commercial pipelines, a self-propelled crawler unit. The plumber feeds it into your drainage system through an existing cleanout or access point.
As it travels through the pipe, it transmits a live, real-time image to a monitor above ground. The plumber watches the footage as it happens and can locate the camera's exact depth and position from the surface using a locator device.
✅ Because the camera is fed in through an access point that already exists, there is no need to dig up your lawn, driveway, or garden to carry out the inspection. The process is non-invasive by design.
Most residential sewer and stormwater inspections use push-rod cameras with built-in lighting that handles standard pipe sizes (50mm to 225mm). Larger commercial or civil drainage systems may use remotely operated crawler cameras for pipes too wide for a push rod to traverse effectively.
The footage is recorded throughout, and the plumber uses it to produce a condition report that documents what was found, where it sits inside the pipe (depth and distance from the access point), and what your repair options are.
Anything visible inside the pipe that a standard building inspection would never detect. In practice, the most common findings fall into four categories.
Tree roots are the leading cause of recurring blocked drains in Sydney, particularly in older suburbs with established trees and ageing clay or concrete pipes. Roots follow moisture and can work their way through hairline cracks or loose pipe joints. Once inside, they grow and branch out, catching debris with every flush. The camera shows exactly where the roots have entered, how far they extend, and how dense the intrusion is. That information tells the plumber whether root cutting and hydro-jetting will solve it, or whether the pipe itself needs relining.
Older terracotta and concrete pipes are brittle. Ground movement, soil pressure, vehicle loading, or decades of root intrusion can cause them to crack, fracture, or fully collapse. You will not see any of this from the surface, and a simple drain-clearing job will not fix it. The camera makes it visible. A clear image of a cracked pipe also tells the plumber exactly how much of the run is affected, which determines whether a sectional relining job or a full pipe replacement is the more practical and cost-effective option.
In kitchen drain lines and commercial grease traps, accumulated fat, oil, grease, and food particles narrow the internal bore of the pipe over time. The camera captures this build-up as a visible restriction on the live feed.
Foreign objects (wet wipes, sanitary products, broken pipe fragments, and, more often than you would think, children's toys) also show up clearly. Misaligned joints and bellied pipe sections (where a pipe sags and allows water to pool rather than drain away) are also identified at this stage.
CCTV drain cameras give a clear picture of the pipe's interior condition, but they are a visual diagnostic tool, not a pressure or leak detection device. Very minor seeping behind a pipe wall that has not yet caused internal damage may not be visible on the footage. Completely collapsed or fully blocked sections can also restrict camera travel, which means the inspection may only capture part of the run. Your plumber will flag this where it applies.
A drain cleaning service (hydro-jetting, electric eel, or a manual snake) clears a blockage. A CCTV drain inspection identifies what caused it.
Both are often used together.
Clearing a blockage without knowing why it occurred is a short-term fix. If the cause is a fractured pipe, misaligned joint, or established root network, the blockage will return. The inspection gives you the diagnosis so that the repair addresses the actual problem, not just the symptom.
Many plumbers use the camera before and after a clearing job. The pre-clearing footage shows the cause. The post-clearing footage confirms the pipe is fully clean and the cause has been addressed. If the camera reveals structural damage after clearing, the plumber can quote for relining or repair on the same visit.
Not every blocked drain needs a camera inspection. A first-time kitchen sink blockage from grease build-up usually responds to a hydro-jet clean without any further investigation. But there are six situations where booking a CCTV inspection is the right call.
A standard residential CCTV drain inspection typically takes between 30 and 60 minutes, depending on the length of the drainage system and whether multiple access points need to be assessed.
Here’s what the process usually looks like:
The cost of a CCTV drain camera inspection can vary depending on the property and the complexity of the drainage system. In most cases, pricing is influenced by how accessible the pipes are, how extensive the inspection needs to be, and whether additional work is required to properly assess the issue.
If the drainage system has a clear, easily accessible entry point, the inspection is typically quicker and more straightforward. However, where access needs to be created or located, or where multiple sections of pipe need to be inspected, the cost will generally be higher. Larger or more complex systems, such as those in commercial or multi-dwelling properties, may also require additional time and equipment.
In some cases, a CCTV inspection is carried out alongside a blocked drain service to confirm that the issue has been fully resolved. When this happens, the inspection may be included in the overall service or offered at a reduced rate.
💡Because every situation is different, many plumbing providers will assess the issue first and provide a clear, upfront quote before any work begins.
Not every inspection uncovers a problem. If the camera comes back with a clean result, you have peace of mind and a baseline footage record that is useful for future maintenance planning or insurance documentation. That is a good outcome.
If the inspection does find something, repair options fall into three broad categories depending on what the footage shows.
Recommended Read: Is Pipe Relining Worth It?
Recommended Read: The Average Cost of a Pipe Replacement
If your inspection comes back clean, a few basic habits go a long way toward keeping it that way.
Older Sydney properties with original clay or terracotta pipes benefit from a proactive inspection as part of their regular maintenance schedule. The footage from each inspection gives you a documented baseline, making it easier to track how the pipes are ageing over time and plan repairs before they become emergencies.
When drainage issues are hidden underground, it’s easy to rely on guesswork, but and that often leads to unnecessary costs, repeated problems, or temporary fixes that don’t last. CCTV drain inspections remove that uncertainty by showing exactly what’s happening inside your pipes, so decisions can be made with confidence.
Whether you’re dealing with ongoing blockages, planning preventative maintenance, or simply want peace of mind about the condition of your drainage system, an inspection provides clear, actionable insight without the disruption of excavation.
If your drains are blocking repeatedly, you are buying a property, or you just want to know what is going on inside your pipes, Plumberoo can arrange a CCTV drain camera inspection across greater Sydney. Call us on (02) 9191 8787 or book online.
Most residential CCTV drain inspections take between 30 and 60 minutes. The duration depends on the length of the drainage run, how accessible the cleanout is, and whether multiple sections of pipe need to be inspected. Larger commercial or strata properties with more complex drainage systems will take longer. Plumberoo aims to complete the inspection and provide a verbal summary of findings on the same visit.
Yes. Push-rod CCTV cameras are mounted on a flexible cable designed to navigate standard bends and junctions in residential drainage systems. The camera is not a rigid device. That said, extremely tight bends, collapsed sections, or pipes that are fully blocked with debris can restrict how far the camera travels. Your plumber will advise if any part of the run could not be inspected.
No. A CCTV drain inspection is non-invasive. The camera is inserted through an existing access point or cleanout, so your lawn, garden, and driveway stay untouched throughout. Excavation only becomes necessary if the inspection finds structural damage that cannot be repaired through relining, and even then the camera footage means any digging is targeted to the exact location of the problem.
In most cases, yes. A standard building and pest inspection does not cover the underground drainage system. Cracked sewer lines, established root intrusion, and collapsed pipes are common in older Sydney suburbs and can cost several thousand dollars to repair after settlement. A CCTV inspection before you exchange contracts gives you a clear picture of the pipe condition. If damage is found, you can negotiate on price or request repairs as a condition of sale.
In many cases, yes. If the inspection reveals a blockage or root intrusion that can be cleared with hydro-jetting, this can often be completed during the same visit. For repairs that require relining or excavation, the inspection provides the information needed to book a separate repair job, usually within a short turnaround. Call (02) 9191 8787 to discuss your situation and confirm availability.
For properties with older clay or terracotta pipes, or with large established trees near the sewer line, an inspection every two to three years is a reasonable maintenance interval. This catches root regrowth before it causes a full blockage and allows any developing cracks to be addressed with pipe relining rather than emergency excavation. Properties with known drainage history or previous tree root problems may benefit from annual checks.
Hot water is an essential in homes across Australia. But rising cost of living pressures and increasing energy prices have made it harder for many households to ignore just how much it costs to run older systems.
For many homes, traditional electric and gas hot water units are no longer the most efficient or cost-effective option, especially as daily usage continues to add up on already stretched household budgets.
As a result, more Australians are starting to look for smarter, more energy-efficient alternatives, like heat pump hot water systems, that can significantly reduce running costs while still delivering reliable hot water year-round.
But what is a heat pump hot water system, and is the switch worth it?
This guide walks through exactly how this system works, what you can expect to pay in Sydney in 2026, which rebates apply to NSW households, and how to decide whether a heat pump system is the right choice for your home.
A heat pump hot water system works by extracting heat from the surrounding air and using it to warm water stored in a tank. Unlike traditional systems, it doesn’t generate heat by burning gas or using an electric element. Instead, it moves existing heat energy from the air into the water, which is why it’s so efficient, typically delivering around 3 to 4 units of heat energy for every 1 unit of electricity used.
Because it’s not “making” heat from scratch, it can produce much more heat energy than the electricity it consumes.
💡So when it delivers 3 to 4 units of heat for every 1 unit of electricity, it means:
You use 1 unit of electricity to run the compressor and fanBut that energy is used to extract and move existing heat from the airThe end result is 3–4 units of usable heat energy in your hot water In simple terms, it’s using a small amount of electricity to “collect” heat from the air and concentrate it into your water, rather than generating all the heat yourself.
In Australia, heat pump systems generally come in two main configurations.
Before rebates, a quality heat pump hot water system installed in a Sydney home typically costs between $3,000 and $6,000 all up, depending on the brand, tank capacity, and the complexity of your installation.
Once government incentives such as the federal Small-scale Technology Certificate (STC) discount is applied, the national average installed price sits around $4,800 in NSW.
The unit itself generally represents the largest portion of the investment, with pricing varying based on tank size (commonly ranging from small to large household capacities) and overall efficiency ratings. Higher-end models with improved performance or quieter operation will sit at the upper end of the range.
Installation costs are influenced by the complexity of the job. A straightforward replacement where an old system is being swapped out will generally be more affordable, while additional plumbing adjustments, electrical work, or repositioning of the system can increase the total cost.
In some cases, minor electrical upgrades may also be required to ensure the system runs safely and efficiently, which can add to the overall installation price depending on the condition of the existing setup.
Heat pump systems stand out for their low running costs. By using ambient air instead of generating heat directly from electricity, they consume significantly less energy over time, leading to noticeable annual savings compared to traditional electric storage systems, especially in larger households.
They are also often more cost-effective than gas continuous flow systems over the long term, particularly as energy efficiency improves and usage habits become more mindful.
For homes with solar, savings can increase further by running the system during peak sunlight hours, allowing hot water to be powered largely by self-generated energy and reducing reliance on the grid.
While the upfront cost is higher than that of some traditional systems, the payback period is typically reasonable due to the ongoing energy savings. Homes replacing older electric storage systems tend to see the fastest return on investment, while households switching from modern gas systems still benefit over time, particularly across a 10-year lifespan.

NSW homeowners can access two separate rebate programs when installing an eligible heat pump hot water system. They can be stacked, meaning you receive both.
STCs are a federal government discount that helps reduce the upfront cost of installing a heat pump hot water system in Australia. Instead of you applying for a rebate later, the discount is included directly in your installation quote.
When you install an eligible system, it is awarded a number of certificates based on how much energy it is expected to save over its lifetime. Your installer sells these certificates through an approved system and passes the value back to you as an upfront discount.
In most NSW installations, this typically reduces the cost by around $800 to $1,200, depending on the system size and efficiency.
On top of the federal discount, NSW households may also be eligible for an additional saving through the Energy Savings Scheme. This is another upfront discount applied by an accredited installer at the time of installation.
The value depends on what system you are replacing:
To access this discount, your installer must be accredited under the NSW scheme. If they are not, you won’t receive the state incentive, even if you still qualify for the federal STC discount.
💡Total Estimated Savings (NSW, 2026)
When combined, these incentives can reduce the upfront cost by approximately $1,000 to $2,000, depending on your system and eligibility.
The process is simpler than most people expect. Choose an installer who holds both CEC accreditation (for STCs) and NSW ESS accreditation. Get a quote, confirm the rebates are reflected in the quoted price, sign a nomination form the installer provides, and proceed with the installation. Both discounts are applied before you pay. There is no rebate claim to lodge after the fact.
For most Sydney households, replacing an ageing electric storage system with a heat pump is the most financially sensible upgrade available right now. The combination of low running costs, government rebates, and a 10 to 15-year lifespan makes the numbers work for the majority of detached homes.
But there are some scenarios where a heat pump is not the best fit.
Apartments and townhouses with limited outdoor space or strict strata rules on external units
If you are unsure whether your property suits a heat pump installation, a licensed plumber can assess the site and recommend the right configuration before you commit to anything.
Choosing a hot water system always comes down to your property, your budget, and how you use hot water. Here is how heat pump systems compare to the main alternatives.
| System | Upfront Cost (Before Rebates) | Running Cost (Per Year) | Rebates Available | Best For |
| Heat Pump | $3,000 – $6,000 | $150 – $300 | Yes (STCs + state incentives) | Most Sydney homes are replacing electric storage |
| Electric Storage | $750 – $2,000 | $600 – $900 | No | Rental properties or very low hot water use |
| Gas Continuous Flow | $1,500 – $3,500 | $300 – $550 | No hot water rebates | Homes with access to cheaper gas tariffs |
| Solar Hot Water | $3,000 – $7,000 | $100 – $250 | Yes (STCs) | Homes with strong north-facing roof space and high usage |
Solar hot water and heat pump systems are both highly efficient and benefit from government incentives. The main difference is installation practicality: solar hot water relies on suitable roof space with good sun exposure, while heat pumps require only an outdoor ground-level area.
What to know more? Read Best Hot Water System

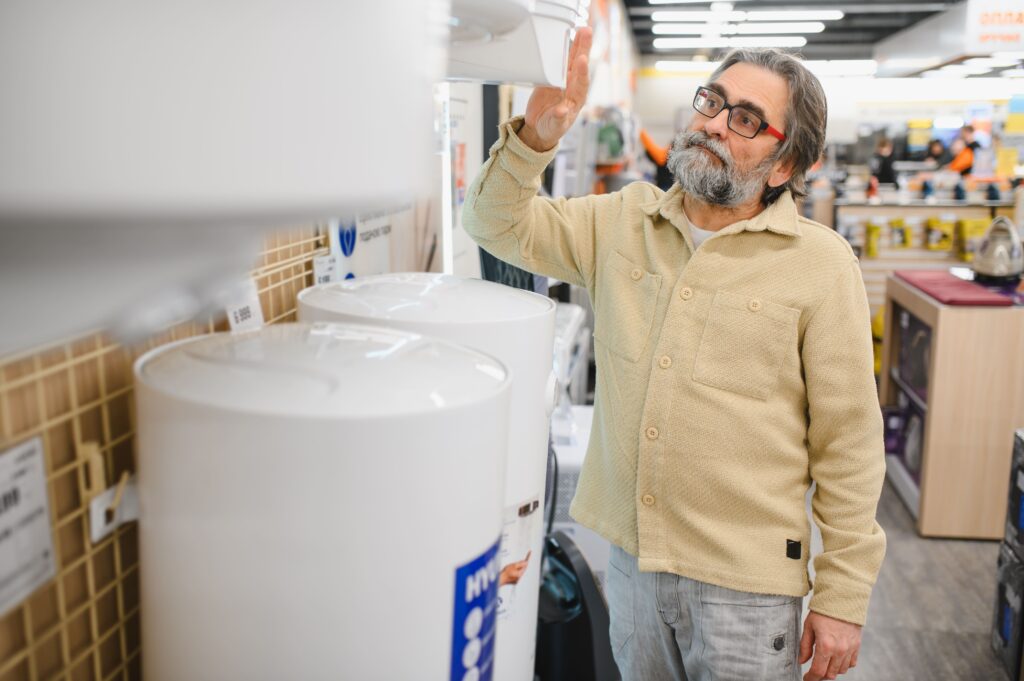
Selecting a heat pump hot water system comes down to two key decisions: choosing the right size for your household and making sure your installer is properly qualified to handle the job—and the rebates that come with it.
Getting the right tank size is essential for ensuring you have enough hot water without wasting energy on an oversized system.
As a general guide:
Your installer will assess your household’s water usage patterns, number of bathrooms, and peak usage times before recommending a system size. This ensures the unit is efficient without running out of hot water during busy periods.
Not all heat pump systems are created equal. When comparing brands, it’s important to look beyond price and consider:
A quality system may cost more upfront, but often delivers better performance, lower running costs, and longer lifespan.
Choosing the right installer is just as important as choosing the system itself—particularly when rebates are involved. Make sure your installer has:
These qualifications ensure your installation is compliant, eligible for rebates, and completed to a professional standard.
Plumberoo is a licenced Sydney plumbing business (NSW Licence No. 289252C) that supplies, installs, and services heat pump hot water systems across Sydney. The team assesses your property, confirms all available rebates, and provides a fixed-price quote with incentives already applied.
Heat pump hot water systems are quickly becoming one of the most practical and cost-effective options for Australian households looking to reduce energy use without sacrificing reliability. By extracting heat from the air rather than generating it directly, they offer a smarter way to heat water, one that can significantly lower running costs over time.
With government rebates available in NSW and across Australia, the upfront investment is more accessible than many homeowners expect, making the switch from older electric or gas systems a realistic upgrade rather than a major financial leap.
Ultimately, the right system depends on your household size, daily hot water usage, and installation setup. But for many Sydney homes, a heat pump offers the ideal balance of efficiency, affordability, and long-term savings.
If you’re considering making the switch, get in touch with the team at Plumberoo today!
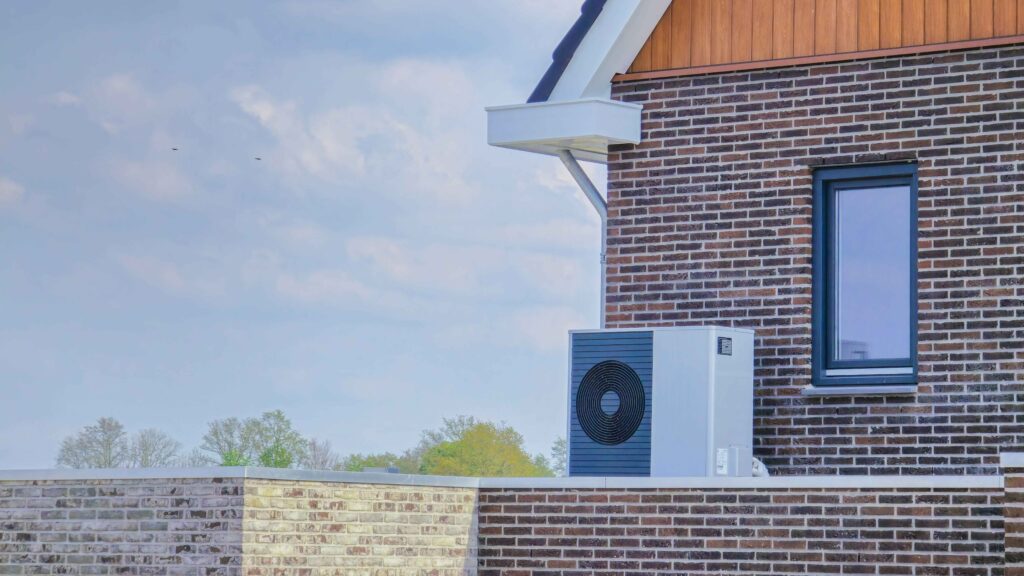
It works like a reverse refrigerator. A fan draws air across an evaporator coil containing refrigerant. The refrigerant absorbs heat from the air and evaporates, then a compressor raises its temperature further, and the heat is transferred to cold water in the storage tank via a heat exchanger. The refrigerant condenses and the cycle repeats. Because the system moves heat rather than generating it, it delivers roughly 3 to 4 units of heat energy for every 1 unit of electricity used.
NSW households can access two programs. The federal Small-scale Technology Certificate (STC) scheme applies a $800 to $1,200 discount at the point of installation on all eligible heat pumps across Australia. On top of that, the NSW Energy Savings Scheme provides a further $200 to $600 off, depending on the system you are replacing. Both discounts appear as upfront reductions in your installer's quote; there is no paperwork for you to submit. Your installer must be accredited under both schemes to pass on both savings.
Expect to pay $3,000 to $6,000 fully installed before rebates, depending on brand, tank capacity, and site complexity. After the federal STC discount ($800 to $1,200), the typical out-of-pocket cost in NSW sits around $4,800. If your installer also holds NSW ESS accreditation, a further $200 to $600 discount applies, bringing the realistic range to $3,000 to $4,600 for most households. Request a fixed-price quote from a licensed plumber after a site assessment.
For most Sydney households replacing an ageing electric storage system, yes. The combination of lower running costs ($150 to $300 per year vs $600 to $900 for electric storage), government rebates, and a 10-to-15-year lifespan means most installations pay back the cost difference within 3 to 6 years. Sydney's mild climate means the heat pump operates at high efficiency year-round, and if you have solar panels, you can set the system to heat during peak generation hours to cut running costs further.
Modern heat pump systems are designed to operate in ambient temperatures as low as -5 to -10 degrees Celsius, well below Sydney's coldest winter overnight temperatures (which rarely drop below 5 to 8 degrees). In very cold climates like the Southern Highlands or alpine areas, performance does drop at low temperatures, and some models include an electric boost element as a backup. For most coastal and metropolitan Sydney locations, cold weather is not a practical concern.
Yes, and the combination is one of the most effective ways to reduce energy bills in an Australian home. Configure the heat pump to run during your peak solar generation window (typically 9am to 3pm) using a timer or smart controller, and most of your hot water will be heated by excess solar power that would otherwise be exported to the grid for a minimal feed-in tariff. A licensed plumber can help set up the correct timer configuration during installation.
Plumberoo handles emergency hot water replacements across Sydney and can generally supply and install a replacement system the same day or next business day. If the rebate paperwork needs to be completed before installation begins (as required under the NSW ESS), the team will walk you through that process quickly so there is no unnecessary delay. Call (02) 9191 8787 to discuss availability and get a same-day quote.
Both are energy-efficient and both qualify for federal STC rebates, but they work differently. A solar hot water system uses roof-mounted collectors to capture heat from sunlight directly, requiring a north-facing, unshaded roof space. A heat pump does not need roof access at all; it draws heat from the surrounding air and needs outdoor ground-level space instead. For Sydney homes with limited roof space or significant shading, a heat pump is often the more practical choice. Running costs are similar, though solar systems can be slightly cheaper in areas with high solar irradiance.
Few household problems are as frustrating as running out of hot water halfway through a shower! Whether your current system has reached the end of its life or you're planning an upgrade, choosing the right replacement can make a big difference to your comfort, energy bills, and long-term running costs.
For most, the first decision comes down to how you want your hot water delivered: a continuous (instant) hot water system that heats water only when you need it, or a storage hot water system that keeps a tank of heated water ready to use. While the difference may seem straightforward, each option has its own advantages depending on your household size, water usage, available space, and budget.
In this guide, we'll explain how continuous and storage hot water systems work, compare their pros and cons, explore installation and running costs, and help you determine which option is the best fit for your home. By the end, you'll have the information you need to make a confident, informed decision.
A continuous flow hot water system (also called an instant or tankless hot water system) heats water only as you use it. When you turn on a hot tap, cold water passes through a heat exchanger inside the unit, is heated almost instantly by a gas burner or electric element, and comes out at the temperature you have set. When the tap is turned off, the unit shuts down. There is no stored hot water and no standby heat loss.
Most Sydney homes use gas continuous flow systems. Electric whole-house models are available but typically require three-phase power, which many residential properties do not have. Small electric instant units for a single bathroom are an option for apartments.
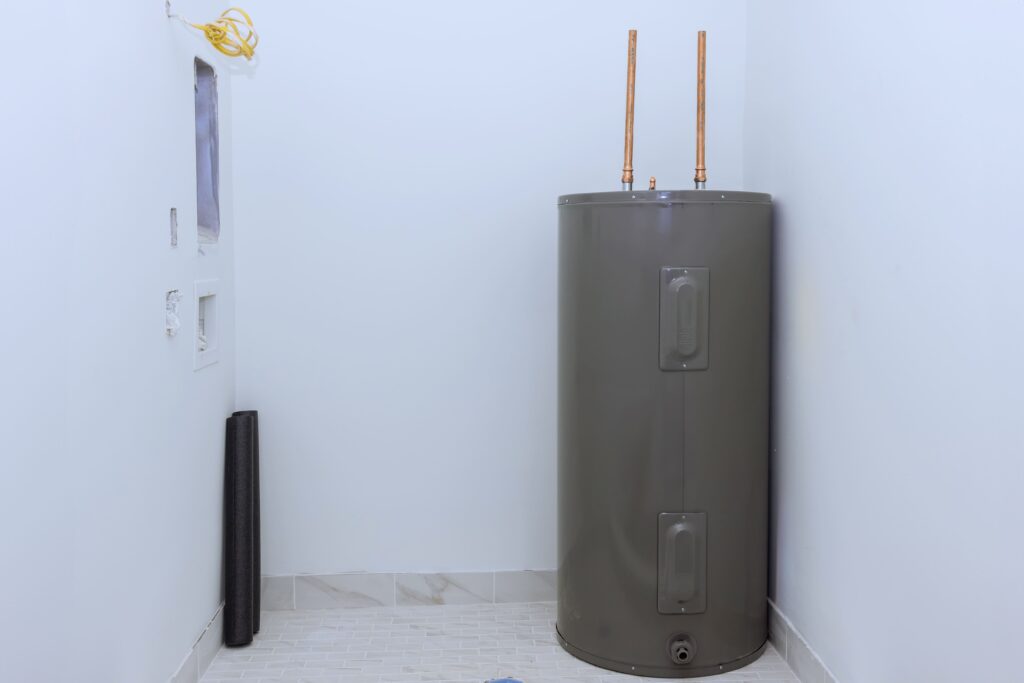
A storage hot water system heats water and holds it in an insulated tank ready for use. The tank is heated by gas, electricity, a heat pump, or solar panels. When you turn on a hot tap, pre-heated water flows from the top of the tank while cold water enters at the bottom to be heated next.
The system maintains the stored water at around 60 to 70 degrees Celsius to prevent bacterial growth (specifically Legionella), which means it is always using some energy to keep water hot even when nobody is using it.
Tank sizes range from around 25 litres for a single person up to 400 litres or more for large households. Once the tank is depleted, you have to wait for the water to reheat, which can take anywhere from 30 minutes to over an hour, depending on the system and energy source.
The table below summarises the main differences between continuous (instant) and storage hot water systems before we explore each option in more detail.
| Feature | Continuous (Instant) Hot Water | Storage Hot Water |
| Heating method | Heats water on demand as you use it | Pre-heats and stores hot water in a tank |
| Hot water supply | Continuous hot water while the tap is running | Limited by the size of the storage tank |
| Energy use | Uses energy only when hot water is needed | Uses energy continuously to maintain water temperature (standby heat loss) |
| Typical upfront cost (unit + installation) | Around $1,200–$2,500 (gas systems) | Around $800–$1,800 (electric or gas systems) |
| Estimated annual running cost (4-person household) | Approximately $250–$600 (gas) | Approximately $450–$1,100 (electric storage) |
| Physical size | Compact, wall-mounted unit | Larger storage tank (indoor or outdoor installation) |
| Typical lifespan | Around 15–20 years | Around 8–12 years |
| Best suited for | Small to medium households, homes with limited space, and those wanting greater energy efficiency | Larger households with high simultaneous hot water demand or homes paired with solar energy |
Has your hot water system stopped working? Whether you need urgent repairs or expert advice on whether it's time to repair or replace your unit, our experienced plumbers are here to help. Learn more about our Hot Water Repairs service and get your hot water back up and running quickly.
Continuous (instant) hot water systems have become an increasingly popular choice for Australian homes.
However, like any hot water solution, they're not the perfect fit for every household. Understanding both the benefits and potential drawbacks will help you decide whether a continuous flow system suits your home's needs.
One of the biggest advantages of a continuous flow system is that you don't have to worry about running out of hot water. Instead of storing heated water in a tank, the unit heats water as it passes through the system. As long as the tap is running and the system is operating within its capacity, you'll have a continuous supply of hot water.
Other key benefits include:
While continuous flow systems offer many advantages, they also have some limitations that homeowners should consider.
Some of the most common drawbacks include:
Storage hot water systems have been a popular choice in Australian homes for decades. By heating and storing a set volume of water in an insulated tank, they're designed to have hot water ready whenever you need it. While they're a reliable and cost-effective option for many households, they also come with a few limitations worth considering.
One of the biggest strengths of a storage hot water system is its ability to supply multiple outlets at the same time. As long as there is enough hot water in the tank, several people can shower or use hot water appliances simultaneously without experiencing a drop in water pressure.
Despite their reliability, storage systems can be less energy efficient than continuous flow units because they continuously work to maintain the temperature of the stored water, even when no hot water is being used.
Upfront cost is what most homeowners focus on, but the more useful number is the total cost of ownership over the system's lifespan. A system that's cheaper to buy may cost significantly more to run over time, while a more expensive unit could save you money through lower energy bills and a longer lifespan.
Looking at the total cost of ownership (including purchase price, running costs, and expected lifespan) gives you a much clearer picture of which option offers the best value.
| System Type | Typical Upfront Cost (Unit + Installation) | Estimated Annual Running Cost* | Typical Lifespan | Estimated 10-Year Cost |
| Gas Continuous (Instant) | $1,200–$2,500 | $250–$450 | 15–20 years | $3,700–$7,000 |
| Gas Storage | $900–$1,800 | $400–$600 | 10–15 years | $4,900–$7,800 |
| Electric Storage (Standard Tariff) | $800–$1,500 | $800–$1,200 | 8–12 years | $8,800–$13,500 |
| Electric Storage (Off-Peak Tariff) | $800–$1,500 | $400–$700 | 8–12 years | $4,800–$8,500 |
| Heat Pump Hot Water | $2,500–$4,500 | $200–$400 | 10–15 years | $4,500–$8,500 |
💡Estimated running costs are based on a typical four-person Sydney household. Actual costs will vary depending on your energy provider, tariff, household size, and hot water usage.
If your home has access to natural gas, a continuous (instant) gas hot water system is often the most economical option over the long term. Although the upfront investment is higher than many storage systems, lower running costs and a longer lifespan can make it the better value over 10 to 20 years.
Storage systems generally cost less to install, making them an attractive option if you're replacing a failed unit on a tighter budget. However, electric storage systems, particularly those on standard electricity tariffs, can become much more expensive to run over time due to the energy required to keep the water hot.
Heat pump systems have the highest initial purchase price but offer some of the lowest ongoing running costs, making them a worthwhile investment for homeowners focused on long-term energy savings.
💡Good to know: If you're changing from a storage hot water system to a continuous flow unit (or vice versa), additional plumbing, gas, or electrical work may be required. Depending on your home's setup, this can add approximately $300–$800 to the installation cost.
The right choice comes down to four things: household size, gas availability, space, and whether you are replacing like-for-like or starting fresh. Here is a straightforward breakdown.
A continuous flow gas system is almost always the better choice here. Demand is low, so flow rate limitations are not a concern. The energy savings compound over a longer lifespan, and the compact footprint suits apartments and studios. If gas is not available, a small electric storage system or a single-tap electric instant unit is a reasonable alternative.
This is where the decision gets more nuanced. A quality gas continuous flow unit (look for models rated at 20 litres per minute or more) handles most family demands well, as long as everyone is not showering simultaneously. If your household has peak-time traffic across multiple bathrooms, a 250-litre gas storage system is more reliable.
Recommended Read: What Size Hot Water System Does Your Household Need?
For households running multiple bathrooms simultaneously or with high morning demand, a large storage system (315 to 400 litres) or two continuous flow units in parallel are both viable solutions. Heat pump hot water is worth considering here too: the higher upfront cost is offset by running costs that are similar to gas, without needing a gas connection.
Space is usually the deciding factor in Sydney apartments and Eastern Suburbs terraces. Continuous flow wins here almost by default: a wall-mounted unit the size of a suitcase versus a tank that requires a dedicated outdoor area or hot water cupboard. Many strata buildings also prohibit roof-mounted solar, which removes that option entirely.
From 1 July 2024, new homes in NSW cannot connect to the gas network for space heating, water heating, or cooking. This does not affect existing homes with gas connections, but it does change the picture for new builds and major renovations. If you are building new or doing a significant renovation, electric heat pump hot water is increasingly the go-to recommendation from NSW plumbers, with federal government rebates available to reduce the upfront cost.
Recommended Read: Best Hot Water System for Australian Homes
Choosing a new hot water system isn't something most people do very often, After installing hot water systems across Sydney for years, the Plumberoo team sees the same mistakes repeat. Worth knowing before you sign anything.
Choosing between a continuous (instant) and storage hot water system comes down to your household's needs, budget, and long-term priorities. If you're looking for greater energy efficiency, a compact design, and an endless supply of hot water, a continuous flow system is often the best choice. On the other hand, if your home has high simultaneous hot water demand or you're working with a tighter upfront budget, a storage system may be the better fit.
The key is choosing a system that's correctly sized for your household and installed by an experienced professional. A well-matched hot water system will provide reliable performance, lower running costs, and years of dependable service.
If you're still unsure which option is right for your home, the team at Plumberoo can help. We'll assess your household's hot water needs, explain your options, and recommend a solution that delivers the best value for your home and budget. Whether you're replacing a failed system or planning an upgrade, we're here to make the process simple and stress-free.
Blocked drains are one of those everyday problems most of us run into at some point. While a plunger can do the trick most times, some blockages sit deeper in the pipe or are a bit too stubborn to shift with simple suction alone.
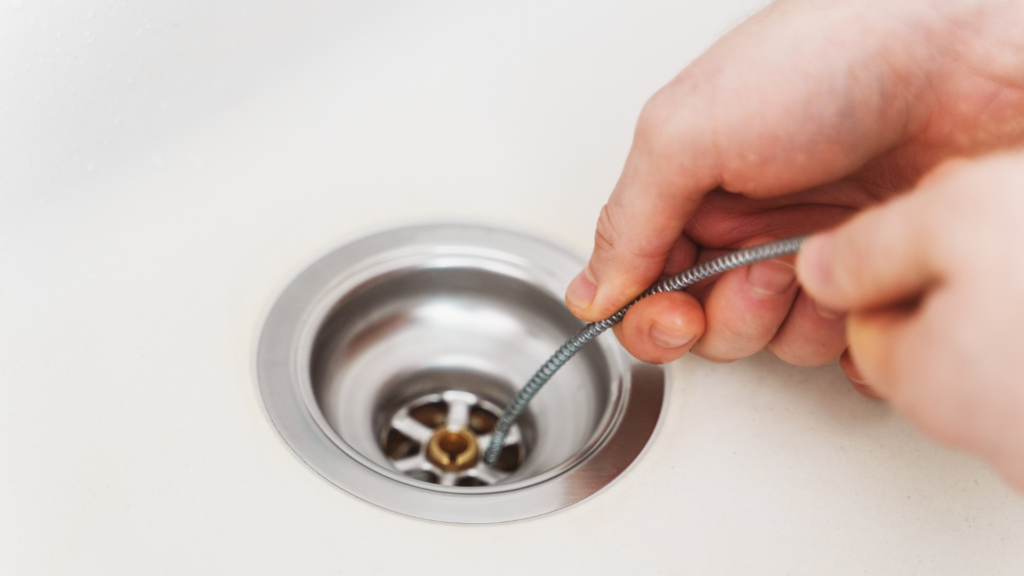
In these cases, a drain snake (or toilet auger) can be a real lifesaver! These tools are designed to reach further into your plumbing and break up or pull out the tougher clogs that a plunger can’t always reach.
Used correctly, they can clear most household blockages quickly and effectively. But they do need a careful hand. Too much force or using the wrong tool in the wrong fixture, however, can end up causing damage instead of solving the problem.
In this quick guide, we’ll walk you through how to use a drain snake or toilet auger safely, when to use each one, and the common mistakes to avoid so you can tackle blockages with confidence
While they are often used interchangeably, a drain snake and a toilet auger are actually designed for different types of blockages and fixtures. Understanding the difference is important—not just for getting the job done properly, but for avoiding unnecessary damage to your plumbing.
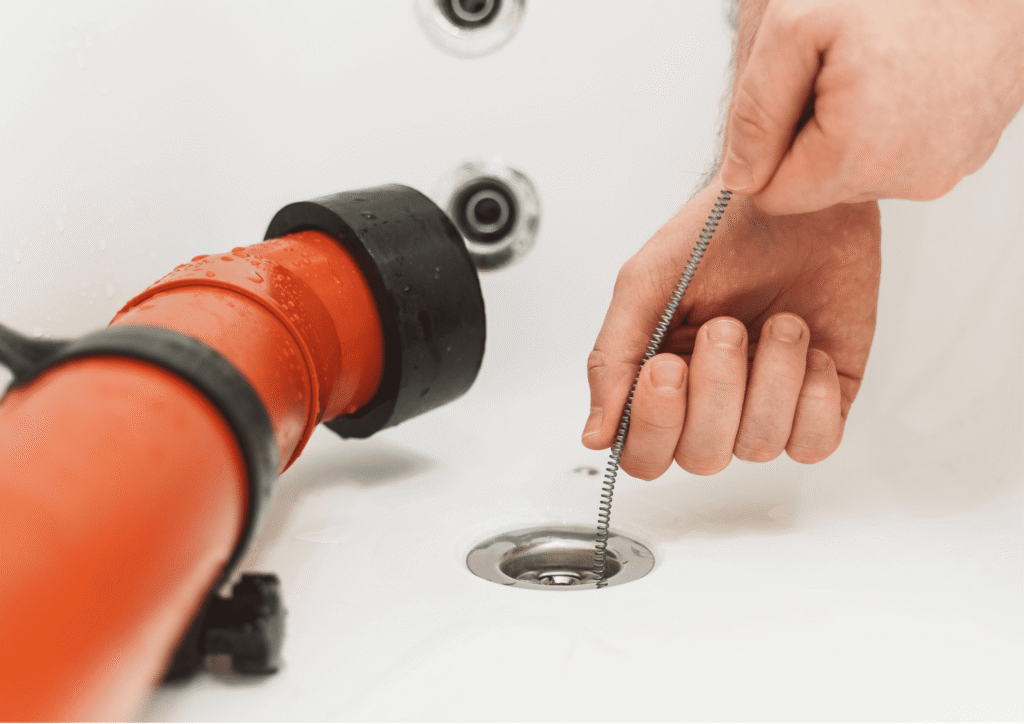
A drain snake is a long, flexible metal cable with a coiled or corkscrew-style tip and a hand crank. You feed it into a sink, shower, tub, or floor drain, then rotate the handle to break up or hook the blockage so it can be pulled back out.
Because the cable is thin and flexible, it can follow the bends in household pipework with ease. This makes it ideal for clearing everyday blockages in drains where hair, soap build-up, or debris tends to collect.
A toilet auger is designed specifically for toilets. It’s shorter, stiffer, and includes a protective curved sleeve at the end.
That sleeve is the key difference as it rests against the porcelain bowl and guides the cable safely through the toilet’s S-bend without scratching or cracking the surface. This allows you to clear blockages inside the toilet trap without damaging the fixture.
🚽Unlike a standard drain snake, it’s built to work within the tight shape of a toilet’s internal plumbing.
For more stubborn or deeper blockages, plumbers may use powered or drum augers. These are much longer, often 8 metres or more, and motorised for extra force.
They’re typically used for sewer lines or heavy-duty blockages that sit beyond the reach of standard hand tools. While highly effective, they require experience to operate safely, as excessive force or incorrect handling can damage pipes or cause injury, particularly in older plumbing systems.
| Feature | Drain Snake | Toilet Auger |
| Primary Use | Sinks, showers, tubs, floor drains | Toilets only |
| Cable Design | Long, flexible metal cable | Shorter, stiffer cable |
| Head Type | Corkscrew or hook-style tip | Spiral head with protective sleeve |
| Flexibility | High – designed to navigate bends in pipes | Moderate – designed for toilet trap shape |
| Protective Features | None | Curved rubber/plastic sleeve to protect porcelain |
| Risk of Damage | Low in appropriate drains | High if used incorrectly or in the wrong fixture |
| Ease of Use | Moderate | Easy for most homeowners |
| Best For | Hair, soap scum, general household clogs | Toilet paper, waste, small obstructions |
| Typical Length | Varies (often 3–10m+) | Short (usually 0.6–1m) |
| Professional Version | Drum/powered augers for deep blockages | Rarely powered in household use |
| Key Advantage | Versatile for multiple drain types | Safe and specifically designed for porcelain toilets |
Snaking a sink or shower drain is a straightforward DIY task for most homeowners, as long as you take your time and let the tool do the work. The key is control; gentle pressure, slow movement, and patience will get you much further than force ever will.
Before you bring out the drain snake, a little preparation goes a long way!
Put on rubber gloves and, if possible, lay down an old towel to catch any mess. Position a bucket underneath the pipework if you can access it. Then remove any visible obstructions like a pop-up stopper, drain cover, or strainer so the cable has a clear entry point.
It’s also best to avoid pouring chemical drain cleaners down beforehand. If the clog doesn’t clear, you’ll be working in a pipe full of harsh, caustic liquid that can splash back during snaking. Over time, these chemicals can also weaken the cable, making it more likely to snap under pressure.
Recommended read: How to Unblock a Shower Drain
💡Pro Tip: Check the P-Trap First
In many bathroom and kitchen sinks, the blockage is actually sitting in the P-trap—the U-shaped pipe directly under the basin. Placing a bucket underneath and unscrewing the trap is often quicker, cleaner, and easier than snaking from above.If the clog is there, you can clear it directly without needing to feed a cable through the entire pipe system.
A toilet auger is the right tool when a plunger has done all it can, but the water is still sitting high in the bowl or draining painfully slowly.
💡The exposed metal cable of a snake drain can easily scratch the glazed surface or, under pressure, crack the bowl. A proper auger is designed specifically to prevent this damage with a curved protective sleeve that guides the cable safely through the toilet trap.
Put on heavy rubber gloves and lay old towels around the base of the toilet to protect the floor from splashes. Pull the auger handle all the way up so the cable is fully retracted into the sleeve. This ensures only the protective housing will make contact with the toilet.
Don’t want to use a auger? Here is an alternative: How to Unblock a Toilet Without a Plunger
There comes a point where a drain snake and auger can only do so much, and recognising that limit is important for avoiding damage and making the problem worse.
When you hit resistance, it means the cable has found something—whether that’s a bend in the pipe, a blockage, or a joint. The instinct is often to push harder, but that’s exactly what causes problems.
Applying too much force can compact the blockage further, kink the cable, or even drive the tip into a weak point in older or worn pipes. In plumbing, slow and steady always wins. Let the tool work—don’t overpower it.
A drain snake or toilet auger only clears the blockage in front of you. It doesn’t fix what’s causing it further down the line.
If you notice any of the following, the issue is likely beyond a DIY fix:
In these cases, continuing to snake the drain will only provide temporary relief at best.
If you’ve reached any of the warning signs above, the safest and most effective option is to stop snaking and call a licenced plumber. When the issue goes beyond a simple blockage, professional plumbers use tools that go far deeper than a hand auger. CCTV drain cameras help locate the exact cause, motorised equipment clears tougher obstructions, and high-pressure hydro-jetting can clean the full pipe wall.
If the problem is structural, pipe relining can often repair the damage without digging up your property.
Dealing with a blocked drain or toilet is never fun, but having the right tool, and knowing how to use it properly, can make all the difference. A drain snake or toilet auger is often enough to clear common household blockages quickly, as long as you work slowly, apply gentle pressure, and let the tool do the heavy lifting.
The key is knowing your limits. If the clog doesn’t shift, keeps coming back, or seems deeper in the system, it’s better to stop before causing damage. What starts as a simple blockage can quickly turn into cracked pipes, damaged fixtures, or a much bigger repair if the wrong approach is used.
When in doubt, it’s always safer to bring in a professional. Our team of licenced plumber can identify the root cause and fix the problem properly, saving you time, stress, and repeat blockages down the track.
Got a stubborn blockage? The Plumberoo team is here to help get things flowing again quickly, safely, and without the guesswork. Book today!
A blocked toilet and no plunger in the house is one of those small emergencies that always seems to happen at the worst possible time. The good news is that you can unblock a toilet without a plunger using things you almost certainly already have, and most household blockages clear with a bit of patience rather than brute force.
Here is what actually works, in the order worth trying, plus the things you should never do to a Sydney toilet.
Before you try anything, take the pressure off. If the bowl is full and threatening to spill, lift the cistern lid and push the rubber flapper down to stop more water entering, or close the small isolation tap on the wall behind the toilet. Then wait. A high water level usually drops on its own over ten to fifteen minutes as water seeps past a partial blockage, and a lower bowl is far easier and less messy to work with.
This is the gentlest fix and it works on a surprising number of blockages. Squeeze a generous amount of dishwashing liquid into the bowl, then pour in a bucket of hot, not boiling, water from about waist height. The soap lubricates the blockage and the weight of the water from a height helps push it through. Give it ten to fifteen minutes. The pouring height matters more than people expect, because it adds gentle pressure without you touching anything.
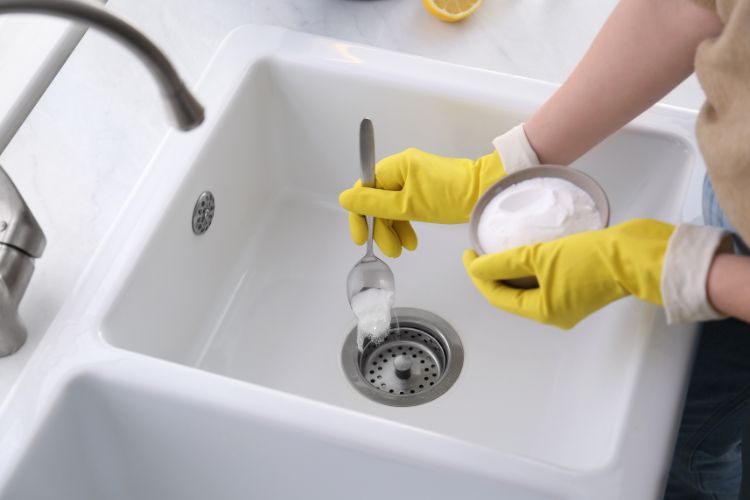
The classic for a reason. Tip about one cup of bicarbonate of soda into the bowl, followed slowly by two cups of white vinegar. It will fizz, and that reaction helps break down organic matter and soap build-up. Leave it for at least half an hour, then follow with a bucket of hot water. This pairing is mild on your pipes, which is exactly why it is a safer first move than any chemical product.
If something is stuck near the top of the trap, an unwound wire coat hanger can reach it. Wrap the end in a cloth and tape it so the bare wire cannot scratch the porcelain, then gently feed it in and work it to dislodge the blockage. Be gentle. This is for reaching a nearby obstruction, not for forcing it, and a hanger is too short and too soft to clear anything deep in the drain.
In a pinch, a toilet brush with a decent head can act like a plunger. Push it into the trap opening and pump it up and down to create suction and pressure. It is not elegant and it is not as effective as a real plunger, but it can shift a soft blockage when nothing else is to hand. Wear gloves and accept that this one is a bit grim.
Do not pour boiling water into the bowl. Porcelain can crack from the sudden temperature change, turning a blocked toilet into a cracked toilet and a much bigger bill. Hot is fine; boiling is not.
Do not reach for caustic chemical drain cleaners either. They are designed for sinks, not toilet traps, they can damage older pipework common in Sydney homes, and they leave a tank of dangerous liquid sitting in the bowl if they fail to clear the blockage, which makes the plumber's job harder and more hazardous.
If the bowl is blocked but you also notice the shower or basin draining slowly, the toilet gurgling when you use other fixtures, or water backing up elsewhere, stop. That is not a simple toilet blockage. It points to a blockage further down the sewer line, often tree roots in older Sydney properties, and no amount of bicarb will fix it. This is the point to call a plumber with a drain camera and an electric eel rather than keep trying at home.
For everyday blockages, hot water with dish soap or a bicarb soda and vinegar treatment will break down most organic matter and paper within thirty minutes. Anything solid, like a toy or a wad of wipes, will not dissolve and needs to be physically removed.
A minor paper blockage often clears on its own as water slowly works past it. A blockage caused by wipes, sanitary products or a foreign object will not, and leaving it risks an overflow.
No. Despite the label, so-called flushable wipes do not break down like toilet paper and are one of the most common causes of blocked toilets and sewer chokes we see across Sydney. Bin them.
Call a plumber if the home remedies fail, if more than one fixture is draining slowly, if the toilet gurgles or water backs up, or if blockages keep returning. Repeat blockages usually mean a deeper problem in the drain that needs a camera inspection.
Tried everything and it is still blocked? Call Plumberoo on (02) 9191 8787. We are on call 24/7 across Sydney, fully licensed (289252c), and if we do not arrive within two hours of an emergency call the call-out is free.
Buy a hot water system that is too small and you will run out mid-shower on a winter morning. Buy one that is too big and you are paying to heat water you never use. Getting the size right is the difference between a system that quietly does its job for a decade and one that annoys you every day. A 250L hot water system suits a lot of Sydney families, but the right answer depends on how many people live in your home and how you all use hot water.
Here is how to size it properly, whether you are choosing storage, continuous flow or a heat pump.
Most hot water complaints are not about a faulty unit. They are about a unit that was the wrong size for the household from day one. Sizing is about matching two things: your peak demand, which is the busiest hot water moment of your day, and your recovery rate, which is how fast the system reheats once it is drained. Get both right and you never think about your hot water. Get either wrong and you notice constantly.
This trips people up. A storage system is sized by how many litres it holds, because it heats a tank in advance and you draw from the reserve. A continuous flow system, sometimes called instantaneous, is sized by how many litres per minute it can heat on demand, because it never stores anything. So comparing a 250 litre tank to a continuous unit by litres alone is meaningless. One number is capacity, the other is flow rate.
As a rough guide for a storage system, the usable capacity you want climbs with the number of people and the type of fuel.
A one or two person household is usually well served by a smaller tank, often in the 125 to 170 litre range for electric, or less for gas because gas reheats faster. A three or four person household, the most common Sydney family, typically lands on a 250L hot water system for electric storage, or around 135 to 170 litres for gas. A five-plus person household often needs 315 litres or more in electric, or a larger gas unit, to avoid running dry during the morning rush.
The reason electric and gas numbers differ so much is recovery. An electric storage unit reheats slowly, so it needs a bigger reserve to cover back-to-back showers. A gas storage unit reheats much faster, so it can get away with a smaller tank for the same household.
The figure that actually decides whether you run out is your peak demand, not your daily total. Picture a winter weekday: three people showering inside an hour, perhaps while the dishwasher runs. That single window is what your system has to cover. A household that showers at staggered times all day can run a smaller unit than a household of the same size that all showers between seven and eight in the morning. When in doubt, size for the busiest hour, not the average day.
Electric storage needs the most capacity because of its slow recovery, and it is cheapest to buy but often dearest to run unless it is on a controlled off-peak tariff. Gas storage and gas continuous recover quickly, so they run smaller for the same demand, and continuous gas in particular gives effectively endless hot water as long as the flow rate suits the number of outlets running at once. A heat pump is an electric system that works like a reverse air conditioner and uses far less power, but it heats more slowly again, so heat pumps are generally sized generously, often 250 to 315 litres, to cover demand while they gently reheat.
Whatever size you choose, the tank itself is kept hot, at 60 degrees or above, to stop Legionella bacteria growing, and a tempering valve brings the delivered temperature down to a safe maximum of 50 degrees at your bathroom taps. That is a national requirement under AS/NZS 3500.4, not a setting you adjust to save space or money.
For most families of four it is a sensible electric storage size, particularly if showers are spread out rather than all crammed into one hour. A family of four that all showers in the same short window, or that has teenagers, may be better with 315 litres or a continuous gas unit.
As a rule of thumb a 250 litre electric storage tank comfortably covers three to four people's daily hot water, assuming normal shower lengths. Long showers, baths and a running dishwasher all draw down the reserve faster.
Continuous flow gives effectively unlimited hot water, which suits households with unpredictable or heavy demand. The trade-off is that flow rate is shared, so running two hot taps at once can reduce pressure. The right choice depends on how many outlets you use at the same time.
A bigger storage tank loses a little more heat standing idle, but the main running-cost driver is the energy source, not the size. Heat pumps and off-peak electric or gas are far cheaper to run than continuous peak-rate electric, regardless of capacity.
Not sure what size suits your household? Call Plumberoo on (02) 9191 8787. We are licensed (289252c), across Sydney, and we will size and quote your hot water system at a fixed price before any work begins.
Most people never think about the shape of the pipe under their toilet until the day they go to replace the toilet and discover that the shiny new one they bought will not connect. The difference between an S-trap toilet and a P-trap toilet is the single most important measurement when you buy a new pan, and getting it wrong means an expensive return or a plumber's bill to adapt it.
Here is how to tell which one you have, and why it matters more than almost any other spec on the box.
Every toilet has a trap: a curved section of pipe that holds a small amount of water to seal sewer gas out of your bathroom. On a toilet, the trap is built into the pan, and the difference between the two types comes down to one thing, the direction the waste exits.
An S-trap exits straight down through the floor. A P-trap exits horizontally out the back, through the wall. That is the whole distinction, and it dictates which toilet will physically fit your existing plumbing.
You do not need to lift anything. Look at where the waste pipe disappears.
If the pipe goes down through the floor behind or beneath the pan, you have an S-trap. This is the most common set-up in older Sydney homes, including most heritage terraces and anything built on a raised floor.
If the pipe runs out the back of the pan and into the wall, you have a P-trap. These are common in newer builds, apartments and concrete slab construction where running waste through the floor is not practical.
Knowing S or P is only half the job. The number that actually matters when you buy a toilet is the set-out, the distance from the finished wall to the centre of the waste pipe.
For an S-trap, measure from the finished wall to the centre of the floor outlet. For a P-trap, measure from the floor to the centre of the wall outlet. Toilets are sold to suit specific set-out distances, and a pan designed for a 140mm set-out will not sit correctly over a 100mm outlet. This single measurement causes more failed toilet swaps than anything else, so write it down before you go shopping.
If you are simply replacing a like-for-like toilet, you want to match the existing trap type and set-out as closely as possible to avoid moving any pipework. If the numbers do not match, you are not stuck, but you are now into either an adjustable pan connector or relocating the waste, which is a bigger job.
This is also why buying a toilet online without checking your set-out is risky. The photos rarely make the trap type obvious, and a beautiful wall-faced pan is useless if your outlet is in the floor and the model only suits a wall outlet.
Yes, within reason. A licensed plumber can fit a pan connector or adjust the waste to convert between trap types or to shift the set-out by a modest amount. It is routine work, but it is plumbing work: cutting and resealing a waste connection has to be watertight and gas-tight, and a poor seal lets sewer odour into the room. If your dream toilet does not match your existing outlet, this is the path, and it is worth getting a quote before you commit to the pan.
Neither is better. They suit different building types. S-traps suit floor-waste plumbing common in older homes; P-traps suit wall-waste plumbing common in newer builds and apartments. The right one is whichever matches your existing outlet.
Some modern pans are sold with an adjustable connector that can accommodate a range of set-out distances and, in some cases, both floor and wall outlets. They cost a little more but reduce the risk of buying the wrong model. Always check the stated set-out range before you rely on one.
Replacing a toilet involves disconnecting and resealing the waste and water supply. A faulty seal can leak water or let sewer gas into the room, and in New South Wales this is licensed plumbing work. It is a job worth handing to a licensed plumber to get the seal right the first time.
For a floor outlet (S-trap), measure from the finished wall to the centre of the waste pipe. For a wall outlet (P-trap), measure from the floor to the centre of the outlet. Take the measurement with you when you buy.
Replacing a toilet and not sure what will fit? Send us a photo or call Plumberoo on (02) 9191 8787. We are licensed (289252c) and across Sydney, and we will tell you exactly what set-out you need.
If your shower has started running lukewarm no matter how far you turn the tap, or scalding hot for no reason, there is a small brass valve near your hot water unit that is almost certainly the cause. It is called a tempering valve, and most Sydney homeowners have never heard of it until it fails.
A tempering valve is a legal requirement on almost every domestic hot water system in Australia, and when it stops working it affects every hot tap in the house. Here is what it does, why it matters, and how to tell when yours needs replacing.
Your hot water system stores water hot, but the water that reaches your bathroom taps has to be cooler. A tempering valve sits on the outlet of your hot water unit and blends a measured amount of cold water into the hot supply, so the water leaving for your bathroom never exceeds a safe temperature.
It does two jobs at once. It protects your household from scalding, particularly young children and older people whose skin burns faster. And it lets the cylinder itself stay hot enough to kill dangerous bacteria. Without a tempering valve you are forced to choose between safe taps and a safe tank. You cannot have both.
The rules sit in the national plumbing standard, AS/NZS 3500.4, and they are not optional. Stored hot water has to be kept at 60 degrees or above so that Legionella bacteria cannot multiply in the tank. At the same time, water delivered to any fixture used for personal hygiene, your shower, bath and bathroom basin, must not exceed 50 degrees. The gap between those two numbers is exactly what a tempering valve manages. You can read the temperature rules in the regulator's explainer on AS/NZS 3500.4 heated water services.
The 50 degree ceiling drops to 45 degrees in higher-risk settings such as early childhood centres, schools, aged care and healthcare facilities, where a thermostatic mixing valve is used instead. For a standard Sydney home, 50 degrees at the bathroom outlet is the number that applies.
A tempering valve has moving parts and a temperature-sensitive element inside it, and it wears out. The symptoms are easy to miss because people blame the hot water system itself. Watch for water that has gone lukewarm at every tap even though the unit is heating normally, water that suddenly runs much hotter than it used to, hot water that fluctuates between hot and cold during a single shower, or a noticeable drop in how much usable hot water you get.
If you have ruled out a flat-out hot water failure and the temperature is simply wrong or unstable, the valve is the most likely culprit. It is a far cheaper fix than a new cylinder, which is one reason it pays to diagnose it correctly rather than replacing the whole system.
These two get confused constantly. A tempering valve is the standard fitting for domestic homes. It blends to a set temperature and is accurate enough for residential use. A thermostatic mixing valve, or TMV, is a more precise device that reacts faster to changes in supply and is required in the higher-risk settings mentioned above. A TMV also needs annual servicing by a licensed person, whereas a domestic tempering valve does not. For the vast majority of Sydney houses, a tempering valve is the correct and compliant choice.
A tempering valve is an inexpensive part, but it is fitted with a licensed plumber's labour and often replaced at the same time as other valves on the unit. As a guide, supply and install typically lands somewhere in the $200 to $400 range for a straightforward swap, though access and the condition of the surrounding pipework can change that. Plumberoo quotes a fixed price before any work starts, so you are never surprised by the invoice.
Expect a tempering valve to last around five years before it drifts out of calibration. Many manufacturers warrant them for a similar period, which is a useful prompt: if your unit is more than five years old and the temperature has gone strange, the valve is the first thing to check.
No. Work on a hot water system is licensed plumbing work in New South Wales, and a tempering valve that is fitted or set incorrectly can deliver scalding water to a child's bath. It is exactly the kind of small job where the consequences of getting it wrong are serious. Plumberoo is fully licensed (NSW Fair Trading licence 289252c), and a valve replacement is usually a same-visit job. If we do not arrive within two hours of an emergency call, the call-out fee is free.
Look at the pipework on top of or beside your hot water unit. A tempering valve is a small brass body, usually with a coloured cap or adjustment screw, sitting where the hot outlet meets a cold inlet. If your home was built or had its hot water replaced in the last couple of decades, you almost certainly have one.
No. Lowering the tank below 60 degrees creates a Legionella risk inside the cylinder. The correct approach is to keep the tank hot and let the tempering valve bring the delivered temperature down to a safe level.
A tempering valve that has failed open lets too much cold water through, so every hot tap runs lukewarm even though the unit is working perfectly. This is one of the most common signs of a worn valve.
A standard domestic tempering valve does not require scheduled servicing, but it should be replaced when it drifts out of range. A thermostatic mixing valve in a commercial or high-risk setting is different and does require annual servicing by a licensed person.
Lukewarm or scalding water at the taps? It is usually a five-minute diagnosis. Call Plumberoo on (02) 9191 8787. We are licensed (289252c), available 24/7 across Sydney, and quote a fixed price before we start.
Most "air con is leaking water" guides treat it as an HVAC problem. They're missing the point. In around 75% of cases the cause is a blocked or improperly installed condensate drain - which is plumbing, not refrigeration. This guide explains the six real causes of an AC water leak, where the water is supposed to go, why Sydney coastal homes are especially vulnerable, and how to tell whether you need a plumber, an HVAC technician, or both.
It's a hot afternoon in Maroubra. You walk into the living room and there's a brown circle expanding across your ceiling. The split-system air con upstairs has been running all day, and now water is dripping onto the rug.
Before you panic-Google and book the first air-con company that returns your call, here's what's actually happening - and why the right first call is often a plumber, not an HVAC tech.
Every air conditioner is, in part, a dehumidifier. When warm humid air passes over the cold evaporator coil inside the indoor unit, the moisture in the air condenses on the coil - exactly the same way water beads on a cold glass on a humid day. That water has to go somewhere.
In a healthy system, the water collects in a tray (the condensate pan), runs out through a small pipe (the condensate drain), and exits the building - either dripping outside, draining into a stormwater point, or piped into your home's waste plumbing under AS/NZS 3500.
In an unhealthy system, that water ends up on your ceiling, in your wall, or pooling under the indoor unit. Here's why.
This is by far the most common cause, and the one most articles understate. The condensate drain is a small-diameter pipe (typically 16-25mm) that runs from the indoor unit's drip tray to an outside discharge point. Over time it accumulates:
Once the drain is blocked, the drip tray overflows and water finds the path of least resistance - usually straight down through your ceiling. This is a drainage problem. It's solved by clearing the line (a plumbing job), not by recharging refrigerant or replacing components inside the AC unit.
After 8-12 years, the metal or plastic drip tray inside the indoor unit can crack, warp, or rust through. Water bypasses the drain entirely and falls straight into the unit cavity. Replacement is an HVAC job, but the diagnosis often happens during a plumber's drain inspection.
A condensate drain needs gravity to work - it must fall at least 1:100 from the indoor unit to the discharge point. If the line was installed too flat, or with a low point that holds water, you'll get intermittent overflow even when the line is "clear". This is a common issue in retrofit installs in older Eastern Suburbs apartments where the drain has been threaded through walls and across roof spaces.
If airflow over the coil drops - usually because the filter is clogged or the fan is failing - the coil temperature can drop below freezing. Ice forms on the coil instead of running off as water. When the unit cycles off, the ice melts all at once, and the drip tray overflows faster than the drain can handle.
Solution: clean or replace the filter, and have an HVAC technician check fan operation.
Same mechanism as a frozen coil, but caused by a slow refrigerant leak rather than an airflow problem. If your AC is also blowing weaker than usual or struggling to cool, low refrigerant is likely. This needs an HVAC technician - refrigerant work is licensed and you can't DIY it.
Less common, but in older Eastern Suburbs homes with ducted systems, condensate drains often run through wall cavities and ceiling spaces. They can be knocked loose by tradespeople doing unrelated work, eaten by rats, or crushed by storage in the roof. If a previously well-functioning AC suddenly starts leaking after work has been done in your home, this is a likely cause.
Under AS/NZS 3500, condensate drains must discharge to one of:
They cannot legally discharge:
A surprising number of Eastern Suburbs AC installations don't comply, particularly in older apartment buildings where multiple split systems have been retrofitted over decades. If your AC has been leaking, getting a plumber to inspect the condensate discharge is a good chance to bring the install up to code at the same time.
The leak point is usually the indoor wall unit, and water tends to drip from the bottom edge of the unit onto whatever is below - floor, furniture, or in the worst case running down the wall behind the plasterboard. The condensate drain is usually a short, accessible run to an outside wall.
The indoor fan unit is usually in the roof space or under the floor. When it leaks, water can pool in the roof void for hours before showing up on the ceiling below - often as a brown stain or sagging plasterboard. The condensate drain is a longer, more complicated run that may pass through cavities and walls before discharging.
Older units often drain straight outside through a small hole. Leaks usually mean the unit is no longer level (often after vibration over years), or the drain hole is blocked. Often cheaper to replace than repair.
Home insurance treatment of AC water leaks varies. As a general rule, sudden damage (a drain that was clear yesterday and is blocked today) is usually covered. Gradual damage (a drain that's been slowly leaking for months) often isn't. Document the moment you noticed the leak, call your plumber promptly, and notify your insurer the same day.
If water has been pooling in a roof cavity or wall, ask the plumber to check for mould development. Mould remediation is a separate (and expensive) job that often isn't covered by standard policies if it's been growing for weeks.
Yes, in some circumstances. Reverse-cycle outdoor units produce condensate when running in heating mode (winter) and need to drain it. Cooling-only units shouldn't drip from the outdoor unit. If you're unsure, check whether the dripping correlates with cooling vs heating.
For a simple split system with an accessible drain, you can sometimes clear it with a wet/dry vacuum attached to the outdoor discharge end. For ducted systems or anything inside a wall, leave it to a plumber - you risk disconnecting the line and turning a minor blockage into a major water damage event.
A standard condensate drain clear is usually $150-$300. Replacing a drip tray or fan motor is $400-$800. Refrigerant work varies widely. If water damage to ceilings or walls has occurred, that's an additional cost - hence the value of acting fast.
We handle the plumbing side of AC water leaks: condensate drains, discharge compliance, water damage assessment, and pipe relining where the drain runs through inaccessible spaces. For refrigerant work and mechanical AC servicing, we work alongside trusted HVAC partners across the Eastern Suburbs.
Air con leaking water through your ceiling? Don't wait for the plaster to give way. Call Plumberoo on (02) 9191 8787 - same-day service across the Eastern Suburbs, $0 call-out, and a clear quote before we touch anything.